Mastering GoReplay Reporting and Metrics

Trying to run tests without reporting and metrics is like trying to navigate a ship in a storm with no compass. You’re just guessing, hoping you don’t hit anything. Metrics are the instruments that tell you exactly what’s happening during a replay test, capturing every little hiccup and performance dip. This data-driven feedback loop is what turns guesswork into genuine insight.
Why Metrics Are Your Best Friend in Traffic Replay
Imagine you’re directing a movie, but you can’t see the video feed from the cameras. You’d have no idea if the actors were hitting their marks. It’s the same with traffic replay—without a clear view of latency spikes or error surges, you’re missing the most critical signals. Metrics bring those hidden patterns to light, showing you exactly where to focus.
With GoReplay, you can mirror your real production traffic and immediately start collecting detailed metrics. This live feedback is what lets you validate new code under the exact same load your users generate. It’s how you move from intuition to hard evidence.
- Real-Time Insights: Get an instant read on latency, error rates, and throughput as the test runs.
- Anomaly Detection: Flag weird, unexpected behavior long before it has a chance to impact customers.
- Trend Analysis: Uncover the slow, creeping performance issues that build up over successive tests.
Metrics as a Flight Recorder
Think of each metric as an instrument in a cockpit. Latency is your altimeter, showing you how high response times are climbing. Error rates are the warning lights, flashing when a system starts to fail.
Metrics on things like connection pooling and TLS act like fuel gauges, telling you how efficiently you’re managing secure channels. Throughput charts are your odometer, mapping out exactly how much traffic you’re handling. Every single data point helps write the story of your system’s performance.
“Metrics turn an abstract stream of traffic into a clear narrative you can read and act on.”
Building Your Feedback Loop
It starts with capturing the raw HTTP logs. Then, you inject GoReplay middleware to pull out the key metrics you care about. Finally, you pipe all that data over to a tool like Prometheus or Datadog for storage and visualization.
| Data Source | Purpose |
|---|---|
| Raw Traffic Logs | Full request and response details |
Once your metrics are centralized, you build dashboards and set up alerts. Define thresholds that matter to you—maybe for p95 or p99 latency—and get notified the moment error rates jump. This automated setup becomes a powerful safety net for every single replay test you run.
Creating a Preventative Test Strategy
This is where things get really powerful. You can use these automated checks to actually gate your CI/CD pipeline. A sudden spike above 200ms for p99 latency? The deployment gets blocked automatically. A sharp rise in 5xx errors? The release is rolled back before anyone even notices.
By treating metrics as actionable checkpoints, you build real, measurable confidence in every change you push. That means fewer fires to put out in production and a much smoother path to continuous delivery.
Sustaining Long-Term Visibility
Running a single test is great for spotting immediate problems, but storing your metrics long-term unlocks a whole new level of analysis. You can start to detect slow performance degradation over weeks or months, or spot capacity bottlenecks before they become critical.
- Baseline Comparisons: Benchmark every new replay against a known, stable version to see exactly what changed.
- Capacity Forecasting: Use traffic growth trends to project your future infrastructure needs.
- Audit Trail: Keep a historical record of performance for compliance or for digging into past incidents.
This historical data becomes your system’s long-term memory. With good retention policies in place, every replay test you run makes your team smarter and your testing decisions sharper.
Ultimately, a metrics-first mindset is what makes every replay test predictable, reliable, and incredibly valuable.
Decoding the Most Important Replay Metrics
When you replay production traffic, you’re essentially putting your application through a real-world stress test. The magic isn’t just in running the test; it’s in knowing which vital signs to check. Focusing on the right reporting and metrics is what separates a simple pass/fail check from a deep, meaningful understanding of your system’s health.
Think of it this way: some data points are just noise, while others are the canaries in the coal mine, giving you an early warning before things go sideways. Let’s dig into the core metrics that actually matter when you’re replaying traffic to validate performance.
The whole process is a beautifully simple feedback loop. A tool like GoReplay captures raw user traffic, replays it against your test environment, and then hands you the essential metrics for analysis.
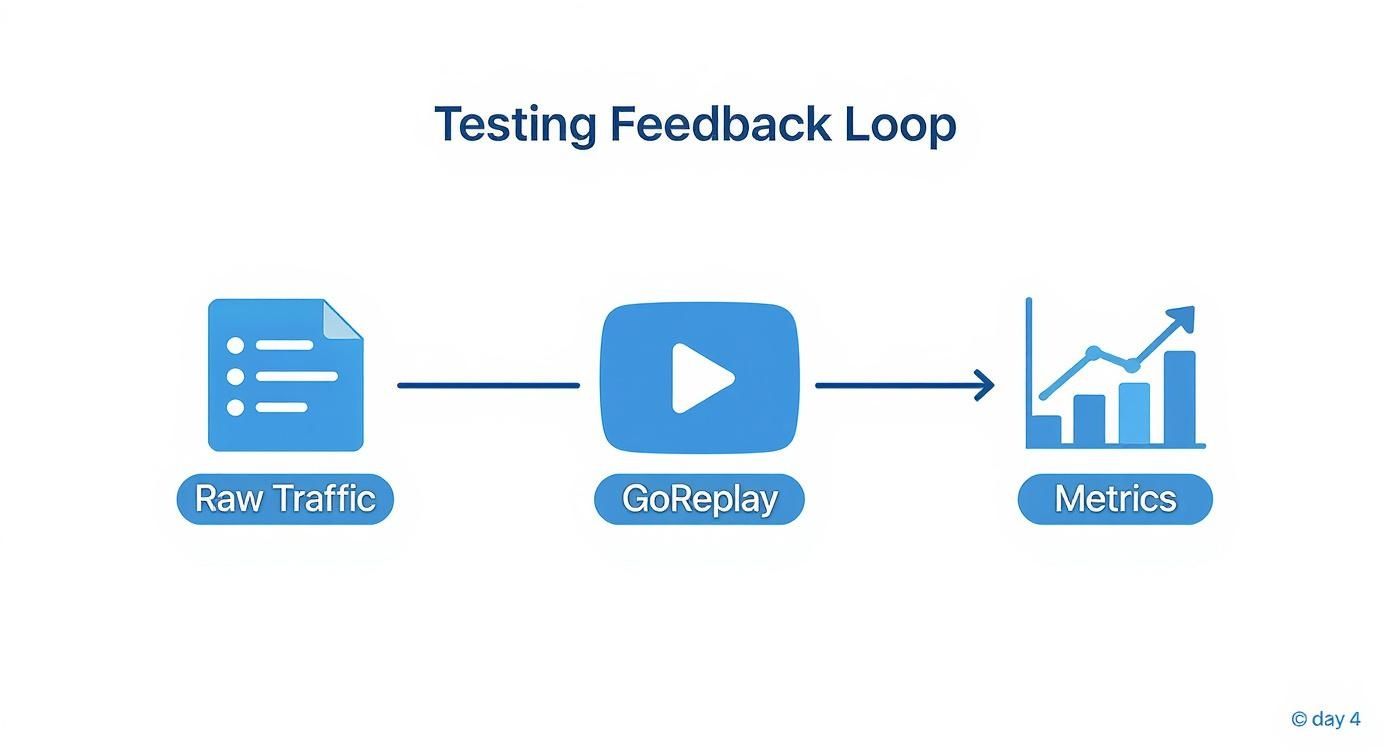
This is how real user interactions get transformed into hard, actionable data, which becomes the foundation of any solid testing strategy.
Let’s dive into the most important metrics you’ll need to monitor.
Core Traffic Replay Metrics
Here’s a quick breakdown of the key metrics, what they mean, and why they’re so critical for different testing scenarios.
| Metric | Definition | Use Case |
|---|---|---|
| Latency | The time taken to process a request and return a response, often measured in percentiles (p50, p95, p99). | Identifying slow endpoints, performance regressions after a code change, and ensuring a good user experience under load. |
| Error Rate | The percentage of requests that fail, categorized by status codes (e.g., 4xx for client errors, 5xx for server errors). | Catching bugs, broken dependencies, or infrastructure issues before they hit production. A spike in 5xx errors is a major red flag. |
| Throughput | The number of requests your system can handle per unit of time, typically measured in requests per second (RPS). | Validating system capacity, identifying bottlenecks, and ensuring your infrastructure can handle production-level traffic. |
| Session Fidelity | How well the replay maintains the integrity of a user’s entire session, including request order and timing. | Testing stateful applications, user authentication flows, and features that depend on a sequence of actions. |
| Resource Usage | Consumption of system resources like CPU, memory, and network I/O during the test. | Detecting memory leaks, inefficient code, and predicting infrastructure costs. |
| User-Behavior | Metrics that reflect specific user journeys or business logic, such as “items added to cart” or “successful logins.” | Validating that core business functions work correctly and perform well under real-world conditions. |
These metrics work together to give you a complete picture of your application’s stability and performance.
1. Latency: The True Measure of Speed
Latency is simply how long it takes for your server to handle a request and send back a response. But looking at the average latency is a classic mistake. Averages can easily be skewed by a ton of fast responses, completely hiding the fact that a small group of users are having a painfully slow experience.
That’s where percentile latencies come in. They tell a much richer story:
- p50 (Median): This is your typical user’s experience. Half of all requests are faster than this value. It’s a good baseline.
- p95: This shows you what a user on a slower connection or during a busy moment might experience. Only 5% of requests are slower than this.
- p99: This represents the worst-case scenario for almost all your users. A spike here is a huge red flag, often pointing to things like overloaded databases, network congestion, or inefficient code that only gets triggered under very specific, heavy loads.
Watching your p99 latency is like listening for the faintest signs of distress in your system. It exposes the pain points that average metrics totally miss, helping you find and fix issues for your most frustrated users.
2. Error Rates: Your System’s Cry for Help
The error rate—the percentage of requests that fail—is one of the most straightforward signs of application health. A sudden jump in 4xx errors (like a “404 Not Found”) could mean you have broken links or buggy client-side logic. On the other hand, a surge in 5xx errors (like a “503 Service Unavailable”) points to a critical failure on your backend.
But monitoring error rates isn’t just about counting them; it’s about understanding them. A healthy system might hover near a 0% error rate, but during a replay test, you might see a specific error code spike. That spike gives you a precise clue about where to start looking for the root cause.
3. Throughput: How Much Can You Handle?
Throughput, measured in requests per second (RPS), tells you how much load your application can take. When you replay traffic, you expect the throughput in your test environment to match what you captured from production. If it can’t keep up, you’ve likely found a bottleneck that’s choking your system.
4. Resource Usage: The Silent Performance Killer
Throughput is only half the story. You also need to keep a close eye on what it’s costing your system in terms of resources. High throughput is great, but not if it’s maxing out your hardware and leading to a crash.
Key resources to monitor include:
- CPU Usage: Are your processors redlining? This could signal inefficient algorithms or a need for more powerful hardware.
- Memory Consumption: Is your application’s memory usage constantly climbing and never coming down? That’s a classic sign of a memory leak.
- Network I/O: Are you hitting the limits of your network capacity? This can become a bottleneck, especially for services that handle large amounts of data.
Putting Your Metrics To Work In QA And DevOps
Grasping what latency or error rates mean is only half the battle. The real payoff comes when these figures steer your QA and DevOps choices in real time. In other words, your metrics aren’t just numbers—they’re a playbook for action.
Think of your dashboard like a car’s instrument panel. The odometer that tallies total requests guides long-term planning. Meanwhile, a sudden spike in 5xx errors is your check-engine light demanding an immediate pit stop. Each gauge should link to a clear step: automated or manual, but always intentional.
Interestingly, this proactive stance echoes trends in corporate reporting. Today, 90% of S&P 500 companies publish detailed ESG data—not simply to tick a compliance box, but to shape strategy and satisfy stakeholders. It’s a reminder that, just like DevOps teams turn performance data into release plans, boards use metrics to chart their next move. Learn more about the rise of data-driven corporate strategy and explore over 50 essential ESG statistics.
Driving Decisions With Your Replay Data
You don’t have to wait for production incidents to find flaws. By plugging replay results directly into your development lifecycle, you build a safety net that catches regressions before they escape into live traffic.
Here’s how key metrics become automated gatekeepers:
- Blocking Unstable Releases In CI/CD: Set your pipeline to fail when a replay test’s p99 latency overshoots your SLA by more than 10%. No manual checks—bad builds stop on the spot.
- Validating Infrastructure Changes: After scaling up your database, replay production traffic and watch for drops in latency and CPU usage. If throughput climbs and resource consumption falls, you know your upgrade paid off.
- Right-Sizing Cloud Resources: During peak replays, if you hit 5,000 requests per second while CPU stays under 40%, you’re probably over-provisioned. Scale down with confidence, cutting costs without sacrificing performance.
By folding metrics into CI/CD, testing evolves from a checklist item into a real-time quality gate. Every commit is vetted against actual performance standards, making your system more resilient by default.
Translating Metrics Into Actionable Tasks
When a key metric crosses a threshold, the next steps must be crystal clear. Ambiguity kills momentum; a well-defined response process keeps the team focused on fixing issues, not debating them.
Example Scenario: A Sudden Spike In 5xx Errors
- Automated Alert: PagerDuty pings the on-call developer with an alert—your replay test just recorded a 5% 5xx error rate.
- Ticket Creation: The CI/CD tool spins up a high-priority Jira ticket, complete with links to the failed build log and the replay dashboard.
- Root Cause Analysis: Using the dashboard filters, the developer pinpoints failing API endpoints and ties them back to the new code changes.
- Rollback And Fix: The culprit commit gets reverted. A fresh replay run proves the fix before the branch is merged again.
This closed-loop workflow means your metrics don’t just sit idle in a dashboard. They actively shape development and release decisions, keeping your application safe and reliable.
How to Capture Metrics Directly from GoReplay
Theory is the map, but hands-on application is what actually gets you to your destination. Capturing useful reporting and metrics from GoReplay isn’t about complicated setups; it’s about knowing the right commands and integrations to use. GoReplay is built to make this process simple, letting you turn a raw stream of replayed traffic into a structured, analytical feed.
The trick is to think of GoReplay as more than just a traffic duplicator—it’s a data source in its own right. It can emit performance stats directly, which you can then pipe into your favorite monitoring and observability tools. This is where you turn raw traffic into real, actionable intelligence.

Using Command-Line Flags for Quick Stats
The easiest way to get started is with GoReplay’s built-in statistical output. By adding a few flags to your replay command, you can get real-time performance feedback right in your console. This is perfect for quick checks during development or for your initial test runs.
Here are the key flags to get you going:
--stats: This is the main switch to enable basic stats collection.--stats-output-http-prom: This flag exposes the collected metrics on an HTTP endpoint, formatted perfectly for Prometheus.--stats-output-file: This writes the metrics to a file you specify, which is handy for post-test analysis or batch processing.
Using these flags gives you an immediate look at high-level numbers like requests per second and total traffic volume, all without needing any external tools.
GoReplay’s native stats are like a multimeter for your application. They give you a quick, accurate reading on the essential currents of your system—latency, errors, and throughput—helping you diagnose problems on the fly.
Integrating with Observability Platforms
For more serious, long-term monitoring, you’ll want to send GoReplay’s metrics to a dedicated platform like Prometheus, Datadog, or Grafana. The --stats-output-http-prom flag is the most popular way to do this. It essentially turns GoReplay into a scrape target that Prometheus can poll to collect data.
This integration transforms temporary test data into a lasting historical record. From there, you can build dashboards to visualize trends, compare performance between different application versions, and set up sophisticated alerts. You can also check out our detailed guide on the initial GoReplay setup for testing environments to make sure your configuration is optimized from day one.
Filtering and Enriching Data for Cleaner Signals
Let’s be honest, not all traffic is created equal. Sometimes you need to zero in on specific parts of your application. GoReplay lets you filter traffic so you only capture metrics for what really matters. For instance, you could isolate requests hitting a critical API endpoint like /api/v2/checkout or filter out all the noise from health checks.
This level of precision keeps your reporting and metrics clean and relevant. The need for precise data isn’t just a tech thing, either—it’s a global business trend. By 2025, mandatory sustainability reporting became a global standard, driven by new regulations. The use of AI in these reporting processes nearly tripled in just one year, showing a massive shift toward data-driven accountability. You can read more about these trends in the full PwC Global Sustainability Reporting Survey.
By combining GoReplay’s powerful traffic manipulation features with its statistical outputs, you can create a highly controlled and observable testing environment. This setup empowers you to move beyond simple pass/fail tests and into a world of deep, data-driven performance engineering.
Building Dashboards and Alerts That Actually Help

Collecting metrics is just the first step. Raw data on its own is often more noise than signal. The real magic happens when you turn that data into a story—one you can understand in a matter of seconds. A great dashboard doesn’t just show you numbers; it reveals relationships, flags anomalies, and points you directly to the root of a problem.
Likewise, a smart alert isn’t just another notification. It’s a precise call to action triggered by a meaningful shift from the norm. The goal here is to move from simply reacting to fires to proactively preventing them in the first place. This is how you level up from passive data collection to active, data-driven decision-making.
Designing a High-Impact Performance Dashboard
Think of your dashboard as the mission control for your replay tests. It needs to answer critical questions at a glance: Did our latest deploy cause a performance regression? Is one particular service buckling under the load? Where are the bottlenecks?
To get that level of clarity, you need a solid visual hierarchy.
- Top-Level KPIs: Start with the big picture. Make your most important metrics—like overall p99 latency, total 5xx error rate, and throughput (RPS)—impossible to miss. These are your system’s vital signs, so display them as large, clear numbers.
- Historical Context: Never rely on a single number. Use time-series graphs to plot your key metrics over the entire duration of the test. This is how you spot the sudden spikes or gradual slowdowns that a single data point would completely hide.
- Detailed Breakdowns: Once you have the high-level view, it’s time to drill down. Add granular charts that break down latency and error rates by specific API endpoints or even by HTTP status codes. This is absolutely crucial for pinpointing the exact source of an issue.
For a deeper dive into building out these kinds of visualizations, check out our guide on creating a comprehensive performance dashboard. A well-organized layout immediately draws your eye to the most critical data, with clear graphs providing the context you need for deeper analysis.
Creating Alerts That Prevent Fatigue
Alert fatigue is a very real problem. When your team gets bombarded with constant, low-priority notifications, they inevitably start tuning them out—and that includes the ones that actually matter. The trick is to create alert rules that only fire when something is genuinely actionable.
A good alert tells you something is broken and gives you a head start on fixing it. A bad alert just tells you something changed, leaving you to figure out if it even matters.
Focus your alerts on two things: significant deviations from established baselines and clear violations of your Service Level Agreements (SLAs).
Dashboard Widgets And Alert Rules
Here’s a quick look at how you can translate key metrics into practical dashboard widgets and alert rules.
| Widget Type | Metric Displayed | Alert Trigger | Use Case |
|---|---|---|---|
| Single Stat Panel | p99 Latency | Exceeds SLA (e.g., > 500ms) for 5+ minutes | Instantly see if user-facing performance is degrading beyond acceptable limits. |
| Time-Series Graph | 5xx Error Rate | Increases by >50% from previous hour | Quickly catch sharp regressions introduced by a new deployment or configuration change. |
| Gauge | CPU Utilization | Stays above 85% | Get a proactive warning that a service is approaching its capacity limits and may soon fail. |
| Table | Top 5 Slowest Endpoints | A new endpoint enters the list and stays | Identify specific parts of your application that are becoming performance bottlenecks. |
This approach helps you build a system that is both informative and respectful of your team’s attention.
Effective Alerting Strategies
- Threshold-Based Alerts: Trigger an alert if p99 latency crosses your SLA threshold for more than five minutes straight. This simple duration rule prevents you from getting paged for momentary, self-correcting blips.
- Sudden Change Alerts: Fire a notification if the 5xx error rate suddenly jumps by more than 50% compared to the previous hour. This is your best bet for catching sharp regressions right after they happen.
- Saturation Alerts: Let your team know when CPU or memory utilization goes above 85% and stays there. This is a clear signal that your system is running out of headroom and is at risk of falling over.
By setting up thoughtful dashboards and precise alerts, you create a powerful feedback loop. Your reporting and metrics are no longer just passive data points; they become an active defense system, helping you build faster and more reliable software before a single customer is ever affected.
Right, you’ve got the theory down, but how do you actually put it into practice? That’s what this section is all about. We’re moving from the “why” to the “how” with a toolkit designed to get you from zero to a working reporting setup in minutes.
Think of these as battle-tested starting points, not final blueprints. Instead of staring at a blank configuration file, you can grab these copy-and-paste examples for common reporting and metrics scenarios and tweak them to fit your specific environment. Let’s get our hands dirty.
GoReplay Configuration for API Load Testing
One of the most common reasons to use GoReplay is to hammer a new API release with production-level traffic before it goes live. Your goal is simple: make sure latency stays within your Service Level Agreement (SLA) and that error rates are non-existent.
Here’s a barebones GoReplay configuration file (goreplay.toml) built for exactly that. It listens for traffic on one port, forwards it to your staging API, and fires up a Prometheus endpoint to expose all the juicy performance metrics.
[input-raw]
Port where your application traffic will be captured
port = “8000”
[output-http]
URL of your staging or test environment API
url = “http://staging-api:8080” workers = 4 # Adjust based on your machine’s core count
[middleware]
Expose metrics for Prometheus to scrape on this address
stats-output-http-prom = “0.0.0.0:9090”
Believe it or not, this simple setup is all you need to start gathering the essentials: request rate, latency percentiles (p50, p95, p99), and counts for every HTTP response code.
Prometheus Alerting Rules for Key Metrics
Having GoReplay spit out metrics is great, but you need Prometheus to watch them and scream when something breaks. A good alerting strategy isn’t about tracking every little blip; it’s about flagging significant changes that signal real trouble.
Below are two alerts you absolutely need. The first one triggers if your API’s p99 latency creeps above your SLA, and the second one fires if you see a sudden burst of server-side errors.
groups:
- name: GoReplayAPIPerformance
rules:
-
alert: HighP99Latency expr: goreplay_http_latency_p99_microseconds > 500000 # 500ms for: 2m labels: severity: critical annotations: summary: “High p99 latency detected” description: “The 99th percentile latency has exceeded 500ms for more than 2 minutes.”
-
alert: HighServer5xxErrorRate expr: rate(goreplay_http_requests_total{code=“5xx”}[5m]) > 0.05 for: 1m labels: severity: page annotations: summary: “Spike in 5xx server errors” description: “The rate of 5xx errors is above 5% and requires immediate investigation.”
-
These rules transform your metrics from a passive dataset into an active defense system. They don’t just tell you something happened; they tell you when a critical threshold has been breached so you can take action immediately.
Grafana Dashboard JSON for Visualization
Finally, you need to see your reporting and metrics. A well-built dashboard tells a story at a glance. While a full JSON file is way too big to paste here, this snippet shows you the basic structure for a Grafana panel that visualizes p99 latency, pulling data from the Prometheus source we just set up.
This is how you’d set up a time-series graph to plot the latency metric GoReplay is capturing. You’d just rinse and repeat this pattern for your other key metrics like error rates and throughput.
{ “title”: “P99 Latency”, “type”: “timeseries”, “targets”: [ { “expr”: “goreplay_http_latency_p99_microseconds / 1000”, “legendFormat”: “p99 Latency (ms)”, “datasource”: “Prometheus” } ], “gridPos”: { “h”: 8, “w”: 12, “x”: 0, “y”: 0 }, “fieldConfig”: { “defaults”: { “color”: { “mode”: “palette-classic” }, “unit”: “ms” } } }
With these three templates, you have all the core pieces for a complete, automated traffic replay and analysis pipeline.
Still Have Questions?
Even when you have a good handle on reporting and metrics, putting it all into practice is where the real questions pop up. Let’s tackle some of the most common hurdles people face when getting started with GoReplay, from tricky session data to performance tuning.
Here are a few practical answers to help you sharpen your testing strategy and get past those common roadblocks.
How Do I Handle Dynamic Tokens in Traffic?
This is a classic one. Dynamic tokens, like auth keys or CSRF tokens, are a frequent challenge in traffic replay. If you just replay them as-is, they’re going to cause a cascade of authentication failures and completely wreck your metrics.
The best way to handle this is with GoReplay’s rewriting capabilities. You can set up rules to find dynamic values from your captured production traffic and swap them out with valid tokens from your staging environment on the fly. This keeps your requests properly authenticated and ensures your test results are actually meaningful, all without any manual babysitting.
Will Capturing Traffic Impact Production Performance?
Keeping overhead low is absolutely critical. While GoReplay is engineered to be lightweight, capturing 100% of the traffic from a high-volume system will inevitably have some performance impact.
You have a few solid options to keep things running smoothly:
- Sampling: Use flags to grab just a percentage of your traffic (say, 10%). This often gives you enough data to be statistically significant without bogging things down.
- Filtering: Zero in on what matters. Capture requests only for the specific endpoints or API paths that are critical for your test.
- Offloading: Run the GoReplay listener on a separate machine. This is a great way to isolate its resource consumption completely from your production servers.
How Can I Compare Metrics Between Two App Versions?
Comparing one version to the next is what this is all about. The most effective way to do this is to run the exact same captured traffic file against both the old and new versions of your application in identical, isolated test environments.
Think of it as creating a controlled experiment. By replaying the same traffic against two distinct deployments (like in a blue/green setup), you can directly attribute any changes in latency, error rates, or resource usage to your new code. It removes all the guesswork.
Once you have the data, export the reporting and metrics from both test runs into your observability platform. From there, you can overlay the time-series data on a single dashboard for a crystal-clear, side-by-side comparison.
Ready to transform your testing with real production traffic? With GoReplay, you can capture and replay user interactions to validate performance, find bugs, and deploy with confidence. Start for free today.