risk based testing: Prioritize Quality and Cut Through Noise

Risk Based Testing (RBT) isn’t about some complex, academic theory. It’s a strategic way to answer a simple, practical question: with limited time and resources, what should we test first?
Instead of trying to test every single thing with the same level of intensity, RBT gets you to focus your firepower on the features with the highest probability of failure and the most severe business impact. This just makes sense. You pour your energy into the parts of your application that could actually hurt the business if they break.
What Is Risk Based Testing and Why Does It Matter
Think of it like triage in a hospital emergency room. Doctors don’t see patients in the order they arrive. They prioritize the ones with the most critical, life-threatening conditions first. Risk based testing brings that same life-saving logic to software quality. It’s a mindset shift away from the impossible “test everything” grind to a much smarter “test what matters most” philosophy.
This approach forces your team to think like business owners before writing a single line of test code. By identifying and analyzing the things that could go wrong upfront, you can channel your most precious assets—your team’s time, your budget, and their skills—where they can do the most good.
Moving Beyond Traditional Testing
Old-school testing often treats every feature as equally important. This “blanket” approach means you waste a ton of effort on low-risk corners of the app while your most critical workflows might not get the deep, rigorous validation they truly need. It’s an inefficient model that just doesn’t work in today’s rapid development cycles.
Let’s look at how these two philosophies really stack up.
Risk Based Testing vs Traditional Testing Approaches
The core difference comes down to strategy. RBT is proactive and targeted, while traditional testing is often reactive and exhaustive, which sounds good in theory but rarely works in practice.
| Aspect | Risk Based Testing (RBT) | Traditional Testing |
|---|---|---|
| Primary Focus | Business impact and probability of failure. | Complete test coverage of all requirements. |
| Strategy | Proactive and prioritized. | Reactive and exhaustive. |
| Resource Allocation | Concentrated on high-risk areas. | Evenly distributed across all features. |
| Test Design | Driven by risk analysis early in the lifecycle. | Driven by specifications, often late in the cycle. |
| Outcome | Reduced critical defects in production. | High test case count, but not necessarily quality. |
| Best For | Complex systems with tight deadlines. | Simple projects with minimal risk. |
As you can see, RBT directly connects your testing activities to real business priorities. It’s not just a process; it’s a framework for making smarter decisions that deliver real value.
This shift helps teams achieve some huge wins:
- Faster Release Cycles: By focusing on the big stuff, you cut out the noise and redundant testing, letting you ship faster without gambling on quality.
- Improved Defect Detection: You naturally find more of the nasty, show-stopping bugs because you’re looking in the most likely places for them to hide.
- Better Resource Allocation: Your QA team isn’t spread thin. They’re aimed directly at the areas that pose the biggest threat to your users and your bottom line.
The core idea behind Risk Based Testing is beautifully simple: make your testing effort match the level of risk. It’s not about testing less; it’s about testing smarter.
This isn’t just a niche strategy anymore; it’s becoming the standard. The global market for Risk-Based Monitoring software—a key part of any RBT strategy—was valued at USD 359 million in 2024 and is on track to hit over USD 1 billion by 2032. That kind of growth shows a clear industry-wide move toward more intelligent, risk-aware quality practices. You can find more details on this trend over at Data Bridge Market Research.
The Four Pillars of a Smart RBT Strategy
An effective risk-based testing strategy isn’t a one-off task; it’s a structured process built on four core pillars. Think of it like a seasoned detective solving a case: you gather clues, analyze the evidence, identify the most likely suspects, and then focus your investigation where it counts.
Each pillar—Identification, Analysis, Prioritization, and Planning—builds on the last, turning the vague idea of “risk” into a focused, actionable testing plan. This framework is what separates chaotic, last-minute testing from a deliberate, high-impact QA strategy.
Let’s break down how each one works.
Pillar 1: Risk Identification
You can’t mitigate a risk you don’t know exists. The first step is all about discovery—getting every potential problem out in the open before it has a chance to blow up in production. This is absolutely not a job for the QA team alone. To get a complete picture, you need to bring everyone to the table.
Think of it like a pre-flight check for a space mission. You’d have the pilot, the engineer, and mission control all brainstorming what could possibly go wrong, from a faulty sensor to a micrometeoroid strike. In software development, this means getting developers, product managers, business analysts, and QA engineers in the same room.
Common ways to unearth risks include:
- Brainstorming Sessions: Get the team together to talk through new features, complex code, and critical business workflows. This is where the real “what ifs” come out.
- Historical Data Analysis: Dig into past bug reports, production incident logs, and customer support tickets. The past is often the best predictor of the future; a module with a history of defects is a prime suspect for new ones.
- Checklists: Use pre-existing lists of common software risks related to performance, security, data integrity, and usability. Don’t reinvent the wheel.
The goal here isn’t to find solutions. It’s just to create a comprehensive list of everything that could go wrong. The output is a raw list of potential risks, which is often tracked in a risk register.
Pillar 2: Risk Analysis
Once you’ve identified all the potential icebergs, you need to figure out which ones are minor bumps and which ones can sink the ship. Risk analysis is where you evaluate each identified risk along two critical dimensions:
- Likelihood (or Probability): How likely is this to actually happen? You can estimate this based on things like code complexity, how often the feature changes, or the stability of the tech it relies on.
- Impact (or Severity): If this does happen, how bad will it be? The impact is all about the business consequences—financial loss, reputational damage, angry users, or even legal trouble.
This process turns a fuzzy concern like “the payment gateway might fail” into something tangible. A bug in a rarely used admin report might have a low likelihood and low impact. But a glitch in the main checkout flow? That’s a high-likelihood event with catastrophic business impact.
At its core, risk analysis boils down to a simple formula that every team should live by: Risk = Likelihood × Impact. This gives you a data-driven way to compare completely different types of potential failures.
Pillar 3: Risk Prioritization
Now that every risk has a score, the third pillar is all about ranking them. This is where you create a clear battle plan that tells your team exactly what to attack first. A simple but powerful tool for this is the risk matrix, often called a heat map.
A risk matrix is just a grid that plots likelihood on one axis and impact on the other. You then place each risk into one of the quadrants:
- High-Risk (Red): High likelihood and high impact. These are your non-negotiable, top-priority items that demand the most rigorous and exhaustive testing.
- Medium-Risk (Yellow): A mix of moderate likelihood/impact, or maybe high likelihood but low impact (and vice-versa). These need solid testing but with less intensity than the red zone stuff.
- Low-Risk (Green): Low likelihood and low impact. These areas might only get a quick smoke test or some basic happy-path validation.
This visual map cuts through the noise and ends subjective debates. It gives everyone from engineers to executives a clear, at-a-glance understanding of the risk landscape and aligns the entire team on what matters most.
Pillar 4: Test Planning and Design
This final pillar is where the rubber meets the road. You take your prioritized list of risks and translate it into a concrete test plan. This plan dictates the depth, scope, and type of testing each feature will receive.
This is where your risk-based testing strategy comes to life. For example:
- A high-risk payment processing feature is going to get the works: comprehensive functional tests, all the negative-path scenarios you can dream up, security penetration testing, and heavy-duty load testing.
- A medium-risk user profile update screen might get thorough functional and integration testing, but you’d probably skip the intense performance tests.
- A low-risk static “About Us” page? It might just get a quick smoke test to make sure it loads correctly.
Ultimately, this pillar is all about smart resource allocation. By pointing your most skilled testers and sophisticated tools at the highest-risk areas, you optimize your team’s effort for maximum impact. You ensure the parts of your application that can cause the most damage are rock-solid before they ever see the light of day.
How to Implement Risk Based Testing Step By Step
Moving from theory to practice is where a risk-based testing strategy really shows its value. But let’s be clear: implementing RBT isn’t about following a rigid, one-size-fits-all checklist. It’s about building a collaborative framework your team can actually use. Think of it less like a strict recipe and more like assembling a toolkit for building a smarter quality plan.
This guide will walk you through the practical steps—from running a cross-functional risk workshop to creating a risk register and a solid scoring system. The goal is to give you an actionable framework you can put to work immediately, turning vague worries about risk into a focused, effective testing effort.
Step 1: Host a Cross-Functional Risk Workshop
First things first: get the right people in a room. Seriously, this is the most critical step. Trying to identify risks with only the QA team is a guaranteed way to develop massive blind spots. Risk identification has to be a team sport.
Your goal is to host a workshop that pools the collective brainpower from across the project. Make sure you invite a diverse group to get a true 360-degree view:
- Product Managers & Business Analysts: These folks are the voice of the customer and the business. They know which features drive revenue, what users can’t live without, and what would cause a PR nightmare. Their input is gold for defining business impact.
- Developers & Architects: They live and breathe the code. They know where the technical debt is buried, which modules are terrifyingly complex, and where the tricky integration points are. They’re the best people to estimate the likelihood of something breaking.
- QA Engineers: Testers have a unique knack for thinking about weird edge cases and failure scenarios nobody else considers. They also have the bug history, which often points to recurring problem areas in the application.
During the workshop, the focus is pure brainstorming. Encourage an open, “what-if” discussion for every major feature. The output should be a raw, unfiltered list of potential risks—this becomes the foundation for your risk register.
Step 2: Create a Comprehensive Risk Register
The risk register is your command center for RBT. It’s not just a list; it’s a living document that tracks every risk from the moment it’s identified until it’s been dealt with. You can start with a simple spreadsheet or use a dedicated tool, but it needs to capture the essentials.
For every risk you’ve identified, log the following:
- Risk ID: A unique code for easy tracking.
- Risk Description: A clear, simple sentence explaining what could go wrong (e.g., “User session data gets lost during a server failover”).
- Feature/Module: The part of the app this risk affects.
- Likelihood Score (1-5): How likely is this to actually happen?
- Impact Score (1-5): If it does happen, how bad will it be?
- Risk Score (Likelihood x Impact): Your final, calculated priority score.
- Mitigation Plan: The specific tests you’ll run to address the risk.
This register turns abstract fears into tangible, actionable items. It creates a single source of truth that gets the entire team aligned on what matters most.
This simple infographic shows how the whole process flows, from identifying risks to planning your tests.
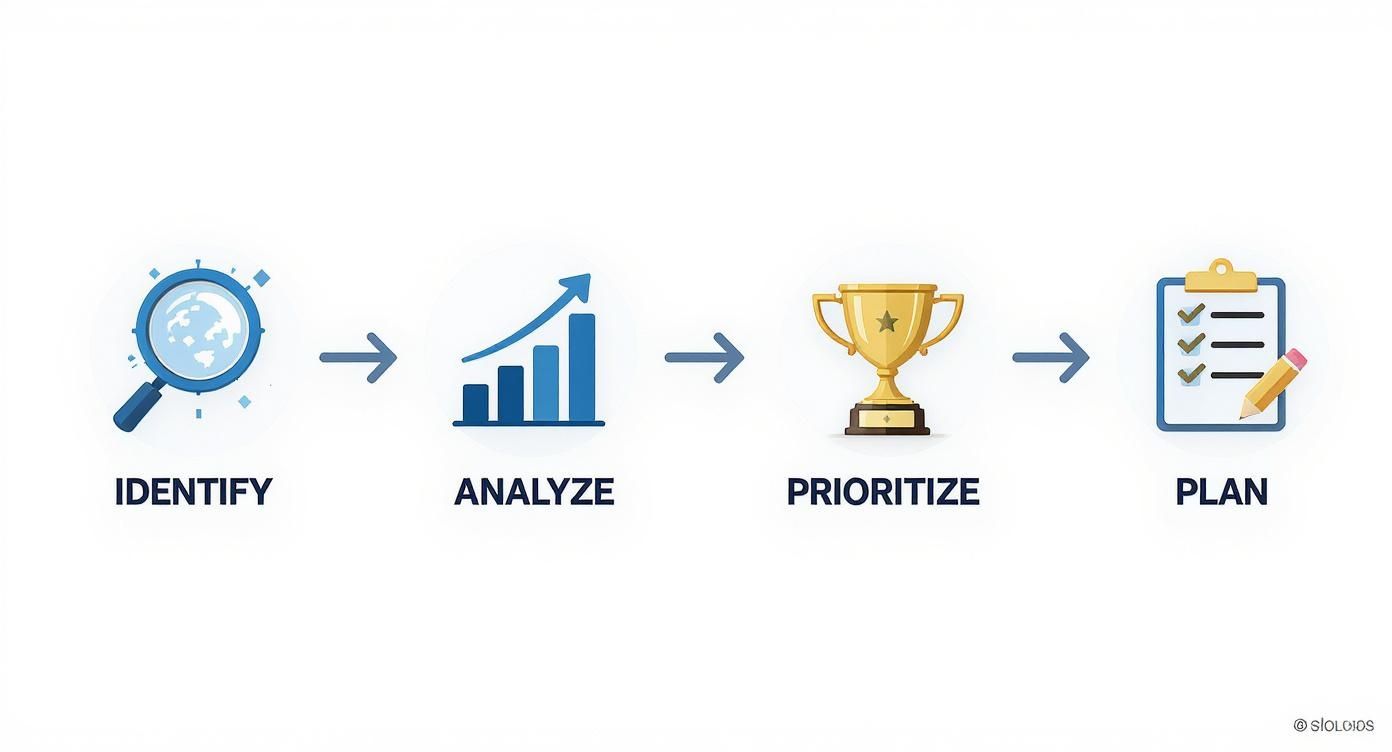
It’s all about taking those raw ideas and refining them into a targeted, prioritized action plan.
Step 3: Develop a Clear Scoring System
Gut feelings and opinions are the enemies of good prioritization. To fight back, you need a clear, simple scoring system for both likelihood and impact. A 1-to-5 scale is a great place to start because it’s easy for everyone to understand. The key is to define what each number actually means so the scores are consistent.
Example Scoring Rubric:
| Score | Likelihood (Probability) | Impact (Severity) |
|---|---|---|
| 5 | Almost certain to happen | Catastrophic business failure, data loss, legal issues |
| 4 | High probability | Major feature unusable, significant revenue loss |
| 3 | Occurs sometimes | Core functionality degraded, poor user experience |
| 2 | Unlikely but possible | Minor feature fails, easy user workaround exists |
| 1 | Extremely rare | Cosmetic issue, minimal user inconvenience |
By multiplying the Likelihood and Impact scores, you get a final Risk Score (from 1 to 25). This number cuts through the noise and helps you objectively rank what needs your attention first.
Step 4: Map Testing Activities to Risk Levels
With a prioritized list of risks, the final step is to decide what you’re going to do about them. This is where you allocate your testing budget—your time and effort—strategically. High-risk items get the five-star treatment; low-risk items get a quick check. This isn’t just a software trend; other regulated fields are catching on. In clinical trials, for instance, RBT adoption has hit 63% among large firms because it helps them manage complexity and replace inefficient manual work. You can read more about these findings in clinical trial management.
Here’s a practical way to map your testing activities:
- High-Risk (Score 15-25): These get the full works. We’re talking deep end-to-end functional testing, extensive negative and edge case scenarios, performance and load testing, and security vulnerability scans.
- Medium-Risk (Score 6-14): These need solid test coverage but not the kitchen sink. Focus on the main positive paths and key integration points. You’ll run thorough functional tests but might skip the intense performance deep-dives.
- Low-Risk (Score 1-5): These are perfect candidates for lighter validation. A quick smoke test or a simple “happy path” automated check is usually enough to confirm the feature isn’t completely broken.
By explicitly linking the intensity of your testing to the level of risk, you ensure your team’s effort is always focused where it can provide the most value—protecting the business and the user from the most significant potential failures.
Validating High-Risk Scenarios with Traffic Replay

This image gets to the heart of a modern risk-based testing strategy: using real-world traffic to drive your validation efforts. By capturing and replaying how actual users interact with your system, you can test your most critical, high-risk scenarios with a level of realism that scripted tests just can’t touch.
So, your risk-based testing strategy has flagged the high-stakes areas of your application—things like payment processing, user authentication, or a core data API. Great. Now what? The natural next question is how to make sure they’re bulletproof.
While manually scripted test cases are a decent starting point, they rarely capture the messy, unpredictable nature of real user behavior. This is where the theory of RBT meets a powerful, practical tool: traffic replay.
Traffic replay completely flips the traditional testing model. Instead of guessing how users might behave, you capture their actual, live interactions from production and replay them in a safe test environment. This gives you a test suite built from reality, not assumptions.
Tools like GoReplay are built specifically for this. They let you shadow your live traffic and use it to rigorously validate changes before they ever go live, making it a perfect fit for tackling the most severe risks you’ve identified.
Simulating Reality to Expose Hidden Flaws
Think about your most critical business workflow, the one that absolutely has to work, no matter what. A scripted test might confirm a transaction completes successfully under ideal conditions.
But what about the real world? What happens when a user frantically double-clicks the “submit” button, navigates back and forth, or sends an unusual data format your script never dreamed of?
These are the exact kinds of edge cases that scripted tests miss but real users create every single day. Traffic replay captures this organic, sometimes chaotic, behavior and throws it at your system, exposing vulnerabilities that would otherwise only pop up in production—the very thing a risk-based testing approach is designed to prevent.
By replaying real user sessions, you move from testing a sanitized, ideal version of your application to battle-testing it against the authentic chaos of the real world. This is the most effective way to gain confidence in your high-risk modules.
This method lets you validate your most important features under the exact conditions they’ll face once they’re live.
Key Applications for Traffic Replay in RBT
Integrating traffic replay into your RBT strategy gives you targeted validation right where you need it most. It’s not about replacing all other testing; it’s about applying a high-impact technique where it delivers the most value.
Here are three core applications:
- Functional Validation of Critical Workflows: Capture traffic from your checkout funnel or user sign-up process. Replaying these complex, multi-step journeys ensures that recent code changes haven’t introduced subtle bugs in your most important business flows.
- Performance Testing on High-Impact Endpoints: A high-risk area isn’t just about functional failure; it’s also about buckling under load. By capturing and replaying peak traffic, you can run incredibly realistic load tests on your critical APIs. For a deeper dive, check out our guide on how traffic replay improves load testing accuracy.
- Verifying Complex Data Interactions: If your app depends on tricky data transformations or third-party integrations, replaying real traffic ensures these connections stay stable and performant after a new release.
GoReplay for Session-Aware Simulations
A simple traffic replay can test individual requests, but the real power comes from understanding user sessions. Modern tools like GoReplay offer session-aware replay, which is absolutely crucial for testing high-risk transactional workflows.
This technology doesn’t just replay a random sequence of API calls. It intelligently reconstructs and replays entire user sessions, preserving the context and order of operations. This is a game-changer for accurately testing stateful applications where the sequence of actions matters just as much as the actions themselves.
For example, a session-aware replay can simulate a complete user journey:
- User logs in
- Adds multiple items to a cart
- Applies a discount code
- Proceeds to checkout and completes payment
Validating this entire sequence with real traffic gives you the ultimate confidence that your most crucial, revenue-generating features are truly production-ready. By connecting a robust risk analysis with the realistic validation of traffic replay, you create a powerful, modern quality assurance strategy.
Measuring the Success of Your RBT Program
You can’t improve what you don’t measure. For a risk-based testing program, that means moving beyond simple pass/fail rates and zeroing in on metrics that prove you’re preventing real business disasters.
Tracking the right KPIs does more than just justify your team’s hard work. It provides cold, hard data to prove the ROI of your RBT program, helps you fight for resources, and gives you the feedback needed to sharpen your strategy over time. This is about measuring your ability to find the right bugs—the ones that truly matter—before they ever see the light of day.
Key Metrics for Risk Based Testing Success
To get a clear picture of how your RBT program is performing, you need metrics that connect your testing efforts directly to risk mitigation. These KPIs tell a powerful story about how well you’re protecting the most critical parts of your application.
A solid measurement framework turns your QA process from a perceived cost center into an undeniable business asset.
Here are a few essential metrics to start with:
- Defect Detection Percentage (DDP) in High-Risk Modules: This is a big one. It measures the percentage of total bugs found in your most critical areas. A high DDP is a fantastic sign that your team is focusing its firepower exactly where it’s needed.
- Reduction in Critical Production Bugs: This is your bottom-line metric. Track the number of high-severity defects that make it to production. A steady downward trend is the most compelling evidence you can present that your RBT strategy is paying off.
- Test Execution Coverage per Risk Tier: Forget about chasing 100% coverage everywhere. Instead, measure it by risk level. You might shoot for 95% coverage on high-risk features, 75% on medium, and maybe just 25% on low-risk areas. This ensures your effort is always proportional to the risk.
By keeping an eye on these, you can clearly show the business impact of your testing. Tying this data to essential performance testing metrics can add even more depth, especially when you’re analyzing those high-risk, high-traffic components.
Demonstrating Value and Driving Improvement
Just collecting the data isn’t enough. The real magic happens when you use these insights to have smarter conversations with stakeholders and make better decisions. A dashboard showing a consistent drop in production incidents after adopting RBT is infinitely more powerful than just showing a raw count of test cases executed.
The goal of RBT metrics is not to judge individual testers but to evaluate the effectiveness of the overall strategy. It’s about answering one key question: Are we getting better at preventing high-impact failures?
This data-driven feedback loop is also crucial for getting better over time. If your Defect Detection Percentage in high-risk areas is lagging, that’s a clear signal. Maybe your risk analysis needs a tune-up, or perhaps the testing techniques you’re using for those modules just aren’t cutting it.
This kind of adaptive thinking is becoming more common, especially when outside events force a change. For example, the COVID-19 pandemic pushed clinical trials to adopt risk-based approaches much faster, with risk assessments jumping by 20% between 2019 and 2020. That shift was a direct response to new operational hurdles, proving that a risk-focused mindset helps organizations stay resilient. By tracking the right metrics, you can ensure your own testing program remains just as agile and effective.
Common Questions About Risk Based Testing
As teams start thinking in terms of risk, a few questions always come up. Shifting away from traditional, “test everything” methods is a big change, so it’s natural to want to understand the details before diving in.
Here are some practical, no-nonsense answers to the most common questions we hear. We’ll cover how RBT fits into modern workflows, how it stacks up against other techniques, and how to get past the most common roadblocks.
How Is Risk Based Testing Different from Exploratory Testing?
Great question. While both rely on a tester’s expertise, they serve completely different purposes and happen at different times. Think of them as two complementary tools in your quality arsenal.
Risk Based Testing (RBT) is all about strategy and planning. It happens before you write a single test case. You’re doing a formal risk analysis—figuring out the probability and business impact of potential failures to decide where your testing firepower is most needed. It’s the blueprint that tells you what to test and how deeply to go.
Exploratory testing, on the other hand, is a tactical, hands-on technique. Test design and execution happen at the same time. A tester uses their intuition and experience to investigate the application on the fly, learning as they go and probing for weaknesses.
They aren’t competitors; they’re partners. Your risk analysis might flag a brand-new checkout feature as a high-risk area. The perfect follow-up? Dedicate a focused, time-boxed exploratory testing session to hammer on that specific feature and find the bugs nobody thought to script for.
Can Risk Based Testing Be Applied in Agile and DevOps Environments?
Absolutely. In fact, it’s almost essential for them. The whole point of risk based testing is smart prioritization, which is the lifeblood of fast-paced, iterative development.
Trying to run exhaustive test suites is a recipe for slowing down sprints and breaking CI/CD pipelines. RBT gives you the framework to make intelligent trade-offs without sacrificing quality where it counts.
- In an Agile Sprint: At the beginning of a sprint, the team can run a quick risk assessment on the planned user stories. This immediately clarifies where to focus testing efforts, ensuring the most critical changes get the most scrutiny before the demo.
- In a DevOps CI/CD Pipeline: RBT is crucial for optimizing your automated tests. Instead of running a massive, hour-long regression suite on every single commit, you can get strategic. A high-risk change to a core payment service might trigger the full battery of integration tests, while a low-risk text change on the marketing site might only need a quick smoke test. This keeps the pipeline fast and feedback immediate.
What Is the Biggest Challenge When Adopting Risk Based Testing?
By far, the biggest hurdle isn’t technical—it’s cultural. The main challenge is getting everyone to agree on what “risk” actually means.
Getting developers, product owners, QA, and business analysts in a room to align on the likelihood and business impact of a potential bug is tough. Everyone brings their own perspective and biases. A developer might downplay the chance of a bug in their own code, while a product owner might see a minor UI glitch as a five-alarm fire.
The only way to move past subjective arguments is to ground the conversation in a transparent, collaborative process backed by data. Successful RBT programs move risk assessment from a meeting of opinions to a structured analysis.
Here’s how to get there:
- Use a Formal Process: Create a simple risk matrix and a clear scoring system. This forces the team to evaluate every risk using the same yardstick.
- Make It a Team Sport: The risk workshop shouldn’t just be a QA task. Pull in people from across the team. When everyone has a voice, the final assessment is much more accurate and has broader buy-in.
- Bring the Data: Don’t just guess. Use historical data from bug reports, customer support tickets, and past production incidents to inform the discussion. Nothing grounds a debate in reality like hard numbers.
A great way to start is with a small pilot project. You can demonstrate the value of a structured approach and build the momentum you need to make risk based testing a core part of how you build software.
Ready to validate your high-risk scenarios with unparalleled realism? GoReplay allows you to capture and replay real user traffic, ensuring your most critical features are battle-tested before they go live. Mitigate risks and deploy with confidence by visiting https://goreplay.org.