A Guide to Load and Stress Testing in Software Testing

Picture this: it’s the biggest sales day of the year for your e-commerce store. Thousands of customers are flooding your site—clicking, browsing, and buying. Can your application actually handle the rush, or is it about to crumble under the pressure?
This is exactly where load and stress testing stop being just another box to check and become absolutely essential for keeping your application reliable and performant.
Why Performance Testing Is No Longer Optional
In the world we live in now, a slow or unavailable app isn’t just a minor hiccup; it’s a direct hit to your revenue and reputation. Users have zero patience. They expect instant, flawless experiences, and anything less sends them straight to your competitor.
Performance testing is the discipline that makes sure your software can meet these sky-high expectations. We’re not talking about finding functional bugs here. It’s all about measuring speed, responsiveness, and stability when real people are using your system.
Think of it as a health checkup for your app’s performance. Just like a doctor monitors your heart rate during a workout, performance testing shows you how your system behaves when users are putting it through its paces. It’s a proactive way to find and fix the bottlenecks before your customers ever feel them.
The Move to Proactive Validation
For a long time, performance testing was an afterthought—something you did right before a big launch, almost as a last-minute sanity check. That reactive approach just doesn’t cut it anymore. Fixing a performance issue after you’ve gone live is exponentially more expensive and damaging than catching it early in development.
Because of this, smart teams are baking performance validation into their workflows from the very beginning.
This isn’t just a hunch; the data backs it up. A Gartner study found that by 2021, over 75% of organizations were already running load tests as a core part of their development cycle. It signals a huge shift toward getting ahead of problems. You can dig deeper into how teams are tackling this in this detailed analysis on software testing trends.
This guide will break down two critical types of performance testing:
- Load Testing: Think of this as a dress rehearsal for your busiest day. It ensures your system can handle the expected peak traffic without breaking a sweat.
- Stress Testing: This is where you push your application beyond its limits to find the absolute breaking point. It tells you how things will fail in a worst-case scenario.
By understanding and using both, you stop hoping your application will perform well and start knowing it will. It’s about building a resilient system that supports your business and keeps users happy, no matter what.
By the end of this guide, you’ll know how to run these tests properly and use modern tools to simulate real user traffic for performance validation you can actually trust.
Distinguishing Between Load Testing and Stress Testing
While they often get lumped together, load testing and stress testing are designed to answer two very different questions about your application’s performance. They’re both critical pieces of the performance validation puzzle, but they serve distinct, complementary purposes. Confusing them can lead to misguided tests and, worse, a false sense of security.
Think of it like testing a new bridge. Load testing is like making sure the bridge can comfortably handle the daily rush-hour traffic—its expected peak load. The goal is to confirm it performs smoothly under normal but heavy conditions, ensuring a good experience for everyone.
Stress testing, on the other hand, is about finding out exactly how much weight that bridge can take before it starts to crack. We keep adding more and more weight, far beyond rush hour, until we find its absolute limit. The goal isn’t just to watch it break but to understand how it breaks and if it can recover gracefully.
This infographic helps visualize where these two testing types fit into the broader performance testing landscape.
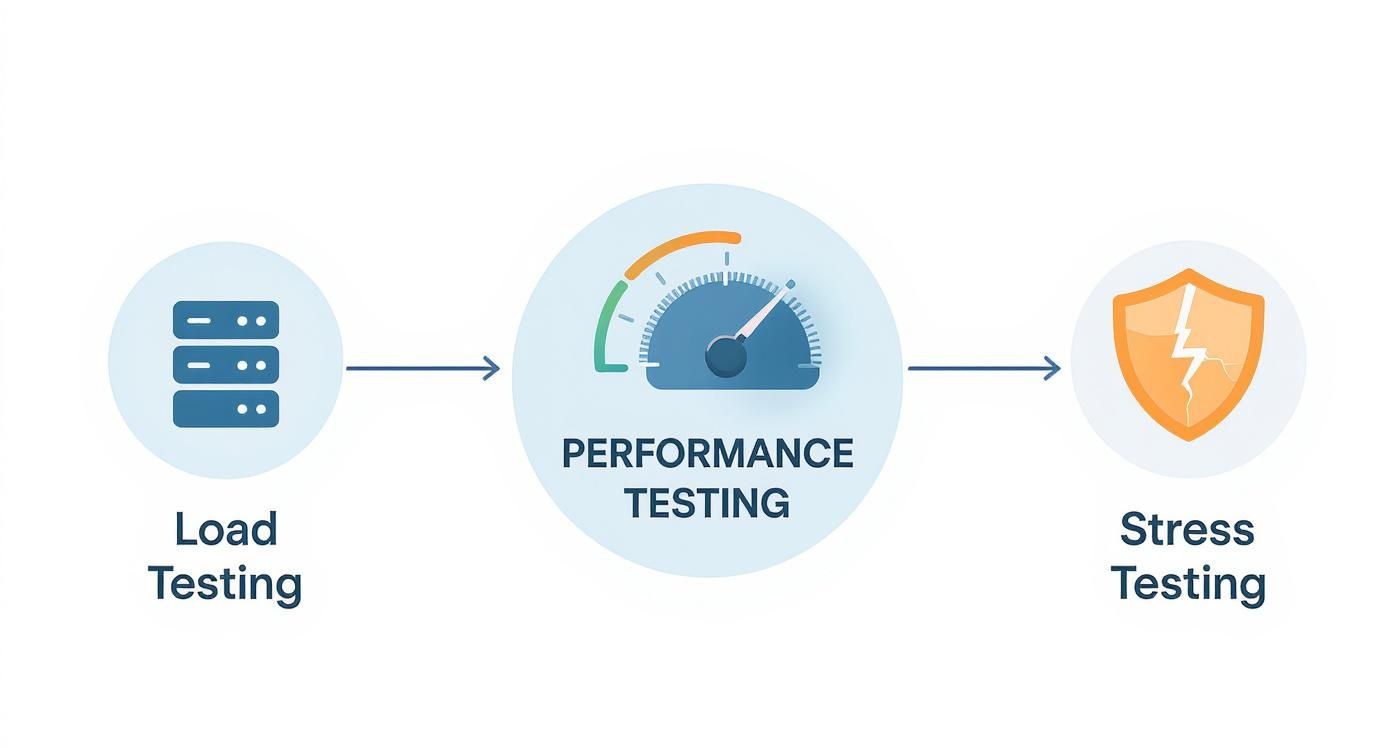
As you can see, both are sub-disciplines of performance testing, but each has its own unique focus: one on expected capacity and the other on resilience at the breaking point.
To really nail down the differences, let’s break down what each one sets out to achieve.
What Is the Core Objective of Load Testing
At its heart, the primary goal of load testing is validation. You want to confirm that your system can handle an anticipated number of concurrent users or transactions while still hitting your performance targets. It’s all about ensuring reliability under expected, real-world conditions.
This type of test isn’t designed to crash your system. Quite the opposite. It measures performance against predefined benchmarks or Service Level Agreements (SLAs) to make sure you can deliver on your promises.
During a load test, you’re zeroed in on metrics that directly reflect the user experience during those peak moments.
- Average Response Time: How long does it take for the app to respond to a user request during peak traffic?
- Throughput: How many requests or transactions can the system actually process per second?
- Error Rate: What percentage of requests fail when the system is under its expected maximum load?
- Resource Utilization: How are the CPU, memory, and network holding up under this load?
Essentially, load testing answers one crucial question: “Can our system handle our busiest day without slowing down or failing?”
How Does Stress Testing Differ
Stress testing has a completely different mission: discovery. Its entire purpose is to push the system well beyond its normal operational limits to find its breaking point. It’s a controlled experiment in failure, designed to see how the system behaves under extreme, even unreasonable, conditions.
By intentionally overloading the application, you uncover its absolute upper limits and identify exactly how it fails. This is vital for understanding system resilience and preparing for those unexpected, massive traffic surges.
A successful stress test doesn’t just find the breaking point; it reveals how the system degrades. Does it slow down gracefully, start throwing errors, or just crash completely? And, most importantly, can it recover once the extreme load is removed?
With stress testing, the metrics you track are all about durability and recovery.
- Maximum Capacity: At what point (e.g., number of users or requests per second) does the system stop responding correctly?
- Failure Point: Which component is the first to give out under extreme load—the database, an API gateway, or something else?
- Recovery Time: How long does it take for the system to return to a stable state after the stress is removed?
This approach helps you prepare for the unexpected, ensuring that even a massive, unplanned traffic spike from a viral marketing campaign doesn’t lead to a total system meltdown. It answers the question: “How much can our system take before it breaks, and what happens when it does?”
Load Testing vs Stress Testing A Head-to-Head Comparison
To make the distinction crystal clear, this table breaks down the key differences between load and stress testing across several critical parameters. You can see how their goals, methods, and the insights they provide are fundamentally different.
| Parameter | Load Testing | Stress Testing |
|---|---|---|
| Primary Goal | Validate performance under expected peak load. | Discover the system’s breaking point and observe its failure behavior. |
| User Load Simulation | Simulates a specific, anticipated number of concurrent users (e.g., 1,000 users). | Continuously increases the user load far beyond normal limits until the system fails. |
| Test Duration | Typically runs for a fixed duration to measure sustained performance. | Runs until a failure point is reached, which could be short or long. |
| Key Performance Metrics | Response time, throughput, error rates, and resource utilization. | Maximum capacity, failure point, and recovery time. |
| Core Question Answered | ”Can we handle our busiest day?" | "How and when will our system break under extreme pressure?” |
| Outcome | Confidence that the system meets performance SLAs under normal peak conditions. | A clear understanding of system limits and how it recovers from failure. |
Ultimately, while load testing gives you confidence in your system’s day-to-day reliability, stress testing prepares you for the unpredictable. Both are essential for building robust, resilient applications that can stand up to the demands of the real world.
Executing Effective Performance Tests
Okay, so you understand the “what” and the “why” of performance testing. Now for the fun part: the “how.” Moving from theory to practice requires a clear, structured game plan. A well-executed test gives you actionable insights. A poorly planned one? It just creates a lot of noise.
Let’s walk through a framework for designing and running load and stress testing in software testing that will actually give you confidence in your application’s stability and performance.
The first step, always, is to define what you’re trying to achieve. Without specific, measurable goals, you’re just shooting in the dark. You have to know what success looks like before you even begin.
A classic mistake is kicking off a test without any real success criteria. You need to be able to answer questions like, “What’s the maximum acceptable response time for our checkout API when 5,000 users are hitting it at once?”
Setting Clear Performance Goals
Before you can measure improvement (or degradation), you need a starting point. This is your performance baseline—a snapshot of how your application behaves under normal, everyday traffic. Think of it as your control group. This benchmark is what you’ll measure all future test results against, making it easy to see if that last deployment helped or hurt.
With a baseline in hand, you can define your Key Performance Indicators (KPIs) and Service Level Agreements (SLAs).
- Define Response Time Thresholds: How long is too long for a user to wait? A product page should probably load in under 2 seconds, but a payment confirmation needs to feel almost instant—say, under 500 milliseconds.
- Set Throughput Targets: How many requests or transactions does your system need to handle? An e-commerce site might aim to process 100 checkouts per minute during a big sale.
- Establish Acceptable Error Rates: Decide what a “normal” failure rate looks like under pressure. Less than 0.1% of all requests failing under peak load is a common target. A zero-error rate is the dream, but not always realistic.
- Monitor Resource Utilization: Keep an eye on your hardware. You might set a rule that CPU utilization shouldn’t climb above 80% for too long, leaving you some headroom for unexpected traffic spikes.
Nailing these down turns your testing from a vague exploration into a precise validation exercise.
Identifying Critical User Journeys
Let’s be real: you can’t test everything. So, you have to focus your energy where it delivers the most bang for the buck. Identify the user journeys that are either super high-traffic, incredibly resource-intensive, or directly tied to making money. Simulating these specific paths will give you the most valuable feedback on real-world performance.

Here are a few classic examples of journeys you can’t afford to get wrong:
- New User Registration and Onboarding: A clunky sign-up process is a great way to lose a potential customer before they even get started.
- Product Search and Filtering: This is often a heavy-hitter on the database. It needs to stay snappy, even when thousands of people are searching at once.
- Adding Items to Cart and Checkout: This is the direct path to revenue. It has to be bulletproof.
- Processing a Payment Transaction: Any failure here means lost sales and very unhappy customers.
By mapping out these key flows, you’re making sure your tests are focused on the parts of your app that truly matter to your users and your bottom line.
Using the Right Tools and Data
The final piece of the puzzle is picking the right tools and, just as importantly, using realistic test data. The market for performance testing tools has exploded in recent years. As of 2025, you can pick from over 25 prominent load testing tools, from great open-source options like Locust and Gatling to powerful platforms like k6 by Grafana. These tools are all built to help you simulate user load and find those weak spots. You can see a rundown of popular load testing software options on BrowserStack to get a feel for what’s out there.
But a great tool is only half the battle. If you test with generic, repetitive data, you’re going to get misleading results. Why? Because things like database caches can kick in and make your application look way faster than it actually is.
To get a truly accurate picture, you need to use a data set that mimics the variety and chaos of real user input. This ensures your tests reflect how the system will genuinely behave in production. Combine clear goals, focused user journeys, and realistic test conditions, and you’ve got yourself a rock-solid framework for performance validation.
Modern Tools for Performance Validation
The tools you choose for your load and stress testing can make or break the reliability of your results. For years, the standard approach involved meticulously writing scripts with tools like JMeter or Gatling. These are powerful platforms, no doubt. They let you simulate user behavior by defining specific, critical paths—a user logs in, searches for something, adds it to their cart, and checks out.
This approach is great for testing the workflows you already know are important. But it has a massive blind spot: it’s all based on assumptions. You’re essentially guessing what your users will do.
Real users are chaotic. They’re unpredictable. They click on weird links, hammer the back button, and interact with your application in ways you could never anticipate, let alone script. This gap between a clean, synthetic test and messy real-world behavior is where performance bottlenecks love to hide.
Moving Beyond Synthetic Scripts
Relying on traditional scripts isn’t just a matter of incomplete testing; it’s a huge, ongoing time sink. Engineering teams pour countless hours into writing, debugging, and—the most painful part—maintaining these fragile test scripts.
Every time a new feature ships or a UI element gets tweaked, the scripts break. The whole maintenance cycle starts over again. This constant churn slows down development and can turn performance testing into a dreaded chore instead of a valuable practice.
Worse yet, these scripts almost always miss the “long tail” of user interactions. We’re talking about the thousands of less common but still valid actions that, when added up, can put a completely unique kind of strain on your system. This is where a more modern approach, often called traffic shadowing or traffic replay, completely changes the game.
Instead of guessing what users might do, what if you could test with what they actually do? Traffic shadowing captures real, anonymized user traffic from your production environment and replays it against a staging or test environment.
This technique gives you a high-fidelity simulation that’s simply impossible to create with hand-written scripts. It includes all the quirks, random navigations, and complex API call sequences that define how people genuinely use your software. By using real traffic, you gain real confidence that your system can handle the pressures of a live production workload.
Introducing GoReplay for Realistic Simulation
One of the best open-source tools for this is GoReplay. It works on a simple but incredibly powerful principle: capture and replay. It listens to the traffic hitting your production server, records it, and then mirrors it over to your test environment. This lets you run load tests with a level of realism that scripted tests just can’t touch.
The process is visualized perfectly on the GoReplay website.

As the diagram shows, GoReplay acts as a listener on the production server. It captures user requests and then replays them against a staging environment, all without impacting your live users.
The benefits of this approach are immediate and significant.
- Zero Script Maintenance: You’re using real traffic, so there are no scripts to write, update, or fix. This frees up huge amounts of engineering time that can go back into building features.
- Discover Hidden Bottlenecks: Replaying real traffic uncovers edge cases and performance gremlins that synthetic tests would never find. It shows you how complex, real-world user flows impact system resources in unexpected ways.
- High-Fidelity Load Profiles: You can accurately simulate your true traffic patterns, from peak-hour surges to the quiet overnight lulls. This gives you a precise understanding of how your application performs under real conditions.
- Safer Deployments: By validating changes against a mirror of your production traffic, you can catch regressions and performance dips before they affect a single user. Deployments become much safer and far less stressful.
By shifting from synthetic simulation to real-world traffic replay with a tool like GoReplay, teams can seriously level up their performance validation strategy. This modern approach ensures that your load and stress testing in software testing efforts are a true measure of your application’s readiness for the wild, unpredictable nature of real users. It closes the dangerous gap between the test environment and production, giving you the insight needed to build truly resilient, high-performing software.
How to Simulate Realistic Traffic with GoReplay
So, are you ready to stop guessing and start testing your application with a true reflection of your user traffic? Using GoReplay is the most direct way to run highly realistic load and stress testing in software testing. Forget about writing brittle scripts; here, you’ll use your actual production traffic to find hidden bugs, validate performance, and deploy with real confidence.
The whole process is refreshingly simple. GoReplay works by capturing traffic from your live environment and safely replaying it against a staging server. This “traffic shadowing” approach means you’re testing against the messy, unpredictable behavior of real users—not just the clean, perfect paths you think they’ll take.
This guide will walk you through the core concepts, from capturing traffic to twisting it for specific testing goals. With practical command-line examples and configuration tips, you’ll see just how easy it is to build a rock-solid performance validation workflow.
Capturing and Replaying Production Traffic
First things first, you need to set up GoReplay to listen to your live traffic. It acts like a quiet observer, sniffing network packets without getting in the way or slowing down your production app. This is a critical safety feature—it guarantees zero impact on your real users while you’re gathering all that valuable test data.
Once GoReplay is listening, you can tell it to save the captured traffic to a file or forward it directly to your staging environment in real-time. The basic commands are designed to be both simple and incredibly powerful.
For instance, to capture traffic from port 80 and send it straight to a test server, your command might look something like this:
gor --input-raw :80 --output-http="http://staging.server"
That one command kicks off the magic. Every single request hitting your production server on port 80 is now being mirrored to your staging server, creating a perfect, real-time load test. To get a deeper look at the fundamentals, check out our guide on how to replay production traffic for realistic load testing.
Manipulating Traffic for Load Testing
Just capturing traffic is only the beginning. The real muscle of GoReplay comes from its ability to manipulate that traffic to hit your specific testing goals. For a standard load test, you might want to see what happens during a huge surge in users—say, double your normal peak traffic.
GoReplay makes this a piece of cake. By saving the captured traffic to a file first, you get complete control over how it gets replayed.
-
Capture Traffic: First, grab a representative chunk of production traffic and save it to a file.
gor --input-raw :80 --output-file=requests.gor -
Replay at Higher Speed: Next, replay that file against your staging environment, but this time, speed it up.
gor --input-file requests.gor --output-http="http://staging.server|200%"
See that |200%? That little operator tells GoReplay to replay the captured requests at twice the original speed. Just like that, you’ve simulated a 100% increase in traffic, letting you see exactly how your system holds up under a heavy—but still realistic—load. You can crank this up to 500% or even 1000% to simulate massive events.
By comparing the responses from your staging environment against the original production behavior, you can quickly identify performance regressions, increased latency, or new errors that would have otherwise gone unnoticed until they impacted real users.
Pushing the Limits with Stress Testing
While load testing checks for expected peaks, stress testing is all about finding the absolute breaking point. With GoReplay, you can turn your captured production traffic into a brutal stress test by continuously ramping up the load until your system finally gives out. This is how you discover critical information about your application’s resilience and its ability to recover.
To pull this off, you can progressively increase the replay speed over time. This controlled escalation of traffic lets you pinpoint the exact moment performance starts to degrade or when components begin to fail.
The evolution of software architecture has also changed how we approach this. Stress testing has adapted to the dynamics of modern systems, especially with autoscaling and serverless tech. As of 2025, key metrics like tail latency, error rate, and saturation signals have become vital for evaluating a system under duress. The focus has shifted from just finding the crash point to assessing how quickly applications can scale, throttle, and recover under extreme load.
Analyzing Results and Finding Bottlenecks
After the tests are done, the final step is analysis. GoReplay helps here by letting you compare the responses from your test environment with the original responses captured from production. This “diff” is incredibly effective at spotting problems.
- Error Discrepancies: Did a request that returned a
200 OKin production now throw a500 Internal Server Errorin staging? - Latency Increases: Are response times on the test server way higher than they were in production for the exact same requests?
- Payload Differences: Has the response body changed in an unexpected way, pointing to a potential regression?
By zeroing in on these differences, you can quickly isolate the impact of your recent code changes. This realistic simulation gives you the hard data needed to fix performance bottlenecks and build a tougher, more resilient application that’s ready for anything.
Building a Truly Resilient Application
So, where does that leave us? We’ve unpacked the details, and it’s clear that load and stress testing in software testing aren’t just different names for the same thing. They’re partners, working together to forge applications that can actually stand up to the chaos of the real world.
Think of them as two sides of the same resilience coin.
Load testing is all about getting your application ready for its best days. It ensures everything runs smoothly during those predictable peaks, like a Black Friday sale or a big product launch. This gives you the confidence that your system can handle expected heavy traffic without breaking a sweat.
Stress testing, on the other hand, is your battle plan for the completely unexpected. It’s about making sure your system can survive a sudden, massive surge with resilience and—just as important—recover gracefully without someone needing to jump in and fix it manually. You can dive deeper into this in our guide to stress testing in software testing to ensure application resilience.
Achieving True Confidence
When you move beyond the limits of synthetic scripts and start using realistic traffic simulation with tools like GoReplay, you gain a totally different level of confidence in your deployments. You’re no longer guessing. Instead, you’re validating your system with the messy, unpredictable behavior of your actual users. This is how you find the hidden bottlenecks that scripted tests almost always miss.
The ultimate goal is to proactively engineer a resilient, reliable, and high-performing application. This commitment not only supports business growth by preventing costly outages but also delights users by delivering a consistently stable experience, no matter what challenges come its way.
By combining the insights from both load and stress testing, you get a complete picture of your application’s health. It’s how you build software that isn’t just functional, but genuinely dependable.
Got Questions? We’ve Got Answers
Even with the theory down, you’re bound to have some practical questions when you start running these tests. Here are the answers to the questions we hear most often.
How Often Should We Be Running These Tests?
The right answer really depends on what you’re testing for.
Load testing should be a constant companion in your development cycle. The best way to do this is to wire it directly into your CI/CD pipeline. This way, every significant change gets a performance check-up automatically, long before it has a chance to slow things down for your actual users.
Stress testing, on the other hand, is more of a special-occasion tool. You’ll want to pull it out before a big architectural shift, after a major performance tuning effort, or when you’re bracing for a huge event—like a product launch—where you expect traffic to blow past your usual peaks.
Is It Okay to Use Production Servers for Testing?
This is a classic “safety vs. accuracy” dilemma, and the answer is pretty clear: it’s a very bad idea to run stress tests on a live production environment. The whole point is to find the breaking point, and you don’t want your real users to be there when you find it. That’s a guaranteed outage.
Some teams tiptoe around load testing on production during quiet, off-peak hours, but it’s risky. The gold standard is to use a dedicated staging environment that’s a perfect clone of production—same hardware, same software, same configuration. This is the only way to get truly accurate results without putting your live service on the line.
Your test environment needs to be an identical twin to production. If it’s not, the bottlenecks you find in staging might be completely different from what will actually bring your system down under real-world pressure.
What’s the Real Difference Between Performance, Load, and Stress Testing?
It helps to think of it like a family tree.
Performance testing is the big umbrella term. It covers any test designed to check a system’s speed, stability, and how responsive it is under a workload.
Under that umbrella, you have a few specific disciplines:
- Load testing is about seeing how the system behaves under a specific, expected amount of traffic.
- Stress testing is about pushing the system way beyond its normal limits to see exactly when and how it breaks.
Is Testing with Real Traffic Actually Better?
Scripted, synthetic tests have their place. They’re great for making sure a specific user journey works as expected. But they have a massive blind spot: they can’t replicate the wild, unpredictable, and sometimes downright weird ways real people use your application.
When you capture and replay actual production traffic with a tool like GoReplay, you’re not just guessing what users might do—you’re testing against what they actually do. This approach uncovers the kind of complex interactions and strange edge cases that scripted tests will always miss. If you want genuine confidence that your system can handle the chaos of the real world, nothing beats testing with real traffic.
Ready to stop guessing and start testing with high-fidelity traffic straight from your users? GoReplay lets you capture and replay real user interactions to find hidden bottlenecks before they find your customers. Start testing with real traffic today.