Apache: apache web server reverse proxy Setup Guide

An Apache web server reverse proxy is a classic but incredibly powerful tool in any system administrator’s toolkit. It sits between your users and your backend servers, taking in all the requests and intelligently forwarding them. For decades, Apache has been the go-to for this, and for good reason—it’s a reliable, flexible, and battle-tested solution for managing traffic, beefing up security, and keeping your application architecture clean.
Why Apache Is Still a Powerhouse for Reverse Proxy Setups

Before diving into config files and directives, it’s worth taking a moment to understand why Apache still holds its own as a top-tier reverse proxy. Sure, there are newer, flashier tools out there, but Apache’s rock-solid reliability and its massive ecosystem of modules give you a level of granular control that’s hard to beat. This isn’t just about blindly forwarding traffic; it’s about managing it with precision.
Think of a reverse proxy as the gatekeeper for your application. It shields your backend services from direct exposure to the wild west of the internet. When a user sends a request, it hits the Apache proxy first, not your actual application server. Apache then inspects the request and decides which backend service should handle it, fetches the response, and sends it back to the user.
This layer of indirection pays off immediately with several key benefits:
- Enhanced Security: By hiding your internal network topology, the proxy acts as the first line of defense, making it much harder for attackers to target your backend servers directly.
- Centralized Management: All your TLS/SSL certificates, security headers, and access control rules can be managed in one central place. No more configuring the same thing on every single application server.
- Improved Scalability: A reverse proxy is the perfect foundation for load balancing. You can easily distribute incoming traffic across a pool of backend servers, preventing any single one from getting overwhelmed.
The Power of Apache’s Module System
The real magic behind using Apache as a reverse proxy is its modular architecture. Apache isn’t a one-size-fits-all tool; it’s a flexible platform you build upon. The star of the show is mod_proxy, but it’s really a team player, working alongside a whole suite of companion modules that add support for different protocols and advanced features.
This modularity lets you build incredibly tailored setups. You can handle standard HTTP traffic, secure real-time WebSocket connections, and even implement sophisticated load-balancing algorithms—all from a single Apache instance. It’s this adaptability that has kept it so relevant.
By acting as a single gateway, a reverse proxy simplifies your architecture. Backend servers can be added, removed, or updated without affecting the public-facing URL, making maintenance and scaling a much smoother process.
Real-World Use Cases and Continued Relevance
The practical applications are endless. Let’s say you’re running a modern web service composed of a Node.js API, a Python admin dashboard, and a legacy PHP application. An Apache reverse proxy can route requests for /api to the Node server and /admin to the Python app, all while serving them from a single, unified domain. To the end-user, it all looks like one seamless application.
Even with the rise of other technologies, Apache’s footprint is massive. As of January 2026, it still powers around 24.3% of all websites where the server is known—that’s over 4.6 million sites. You can dig into more stats about Apache’s market share over at W3Techs. This enduring popularity isn’t just nostalgia; it’s a testament to its reliability and the trust developers place in it for mission-critical tasks like reverse proxying.
Your First Apache Reverse Proxy Configuration
Alright, enough with the theory. Let’s get our hands dirty and build a real, working Apache web server reverse proxy. We’re going to take a standard Apache installation and transform it into a smart gateway that directs traffic exactly where we want it to go.
We’ll start by flipping on the necessary modules and then dive into a VirtualHost configuration to forward requests to a backend app. By the end, you’ll have a rock-solid example that handles both regular web traffic and the tricky real-time stuff like WebSockets.
Enabling the Core Proxy Modules
Before Apache can even think about being a reverse proxy, you have to enable the modules that give it that power. The main player here is mod_proxy—it’s the engine for the whole operation. But on its own, it doesn’t know how to speak specific protocols. For that, it needs a little help from its friends.
For most modern web setups, you’ll need at least two other modules:
mod_proxy_http: This is your workhorse. It handles all the standard HTTP and HTTPS requests your web application will receive.mod_proxy_wstunnel: Crucial for any app with real-time features. This module lets Apache tunnel WebSocket connections (ws://andwss://).
If you’re on a Debian-based system like Ubuntu, enabling them is a simple one-liner with the a2enmod command. Just remember to reload Apache afterward. This quick step is what unlocks Apache’s proxying capabilities, setting the stage for the real configuration.
Before we dive into the directives, it’s helpful to know which modules do what. Here’s a quick rundown of the essential components.
Core Apache Reverse Proxy Modules
| Module Name | Primary Function |
|---|---|
mod_proxy | The core module that provides the fundamental reverse proxy capabilities. |
mod_proxy_http | Adds support for proxying standard HTTP and HTTPS requests. |
mod_proxy_wstunnel | Enables support for tunneling WebSocket (ws:// and wss://) connections. |
mod_rewrite | A powerful URL manipulation engine, often used to conditionally proxy traffic (like WebSockets). |
mod_ssl | Essential for enabling TLS/SSL, allowing Apache to handle HTTPS termination. |
Think of these as the building blocks for any robust reverse proxy setup. Each one plays a specific, vital role in managing and securing your traffic.
Building Your VirtualHost Configuration
The real magic happens inside a VirtualHost block. This is where you lay out the rules of the road for Apache, telling it exactly how to handle requests for a specific domain—which ones to proxy and where they should end up.
Let’s cook up a common scenario. Say you’ve got a Node.js application humming away locally on port 3000. You want to expose it to the world through Apache on the standard web port 80.
To do this, you’ll create a new configuration file (usually in /etc/apache2/sites-available/). Inside, you’ll define the VirtualHost and use a few key directives to manage the traffic.
Pro Tip: Always give each site or proxy its own configuration file. It keeps your main
apache2.confclean and makes it a breeze to enable, disable, or debug individual sites without messing with everything else.
The three directives you absolutely need to know are ProxyPass, ProxyPassReverse, and ProxyPreserveHost. Each one has a distinct job, and together they create a seamless bridge between the client, Apache, and your backend.
ProxyPass: This is the big one. It maps a path on your proxy to a URL on your backend server, effectively forwarding the request.ProxyPassReverse: This directive is more subtle but just as important. It rewrites headers in the response from the backend. Without it, if your app sends a redirect, it could accidentally send users straight to your internal server address, bypassing the proxy.ProxyPreserveHost: When this isOn, Apache passes the originalHostheader from the client to the backend. Many modern applications rely on this to function correctly, so it’s almost always a good idea to enable it.
Here’s what that looks like in a real configuration file, proxying traffic to our Node.js app on port 3000:
<VirtualHost *:80> ServerName yourdomain.com
ProxyPreserveHost On
ProxyPass / http://localhost:3000/
ProxyPassReverse / http://localhost:3000/
With this in place, any request hitting yourdomain.com is instantly passed along to http://localhost:3000/. Simple and effective.
Handling WebSocket Connections
But what about real-time features? Things like chat apps, live notifications, or collaborative docs rely on WebSockets, and a standard HTTP proxy setup just won’t cut it. WebSockets start with a special HTTP “Upgrade” request, and you need to tell Apache how to handle that.
This is where mod_proxy_wstunnel earns its keep, but it needs a little nudge from mod_rewrite.
Let’s say your app’s WebSocket endpoint is at the path /socket. You need to add a RewriteRule that specifically looks for those WebSocket upgrade requests and proxies them using the ws:// protocol.
The configuration gets a slight adjustment:
<VirtualHost *:80> ServerName yourdomain.com
# Standard HTTP Proxy
ProxyPreserveHost On
ProxyPass / http://localhost:3000/
ProxyPassReverse / http://localhost:3000/

# WebSocket Proxy for /socket path
RewriteEngine on
RewriteCond %{HTTP:Upgrade} websocket [NC]
RewriteCond %{HTTP:Connection} upgrade [NC]
RewriteRule ^/?socket(.*) "ws://localhost:3000/socket$1" [P,L]
See what’s happening here? We’ve added a rule that says: if a request for /socket comes in with the Upgrade: websocket header, stop everything and proxy it to ws://localhost:3000/socket. The [P] flag tells it to proxy the request, and [L] means it’s the last rule to apply.
All other traffic flows through the original ProxyPass directive. This dual setup makes your Apache web server reverse proxy smart enough to handle both classic HTTP requests and modern WebSocket traffic without breaking a sweat.
One of the biggest jobs for an Apache web server reverse proxy is handling encryption right at the network edge. This process is called TLS termination (or SSL termination, if you’re old-school). It means your proxy takes on all the encrypted HTTPS traffic from users. It decrypts the requests, passes them along as plain, unencrypted HTTP to your internal services, and then re-encrypts the responses on their way back out.
This setup is a huge win for managing complexity. It centralizes all your certificate management in one spot: the proxy. Your backend application servers no longer have to sweat the computational overhead of encryption and decryption, and you don’t need to juggle individual SSL certs for each one. This makes their configuration way simpler and turns certificate renewal from a headache into a straightforward task.
Enabling SSL and Setting Up Your Secure VirtualHost
First things first, you need to enable Apache’s SSL module, mod_ssl. This is the cryptographic engine that powers TLS connections. On Debian-based systems, this is usually a quick command, followed by a server reload to make the changes stick.
With the module active, you can set up a VirtualHost to listen on port 443, the standard for HTTPS. The configuration will feel familiar if you’ve ever set up a port 80 VirtualHost, but with a few critical additions for handling the encryption. Specifically, you’ll need to tell Apache where to find your SSL certificate and its matching private key.
For development or just kicking the tires, you can generate a self-signed certificate to get going without buying one. This flowchart breaks down the general process for enabling, configuring, and forwarding traffic in a secure proxy setup.
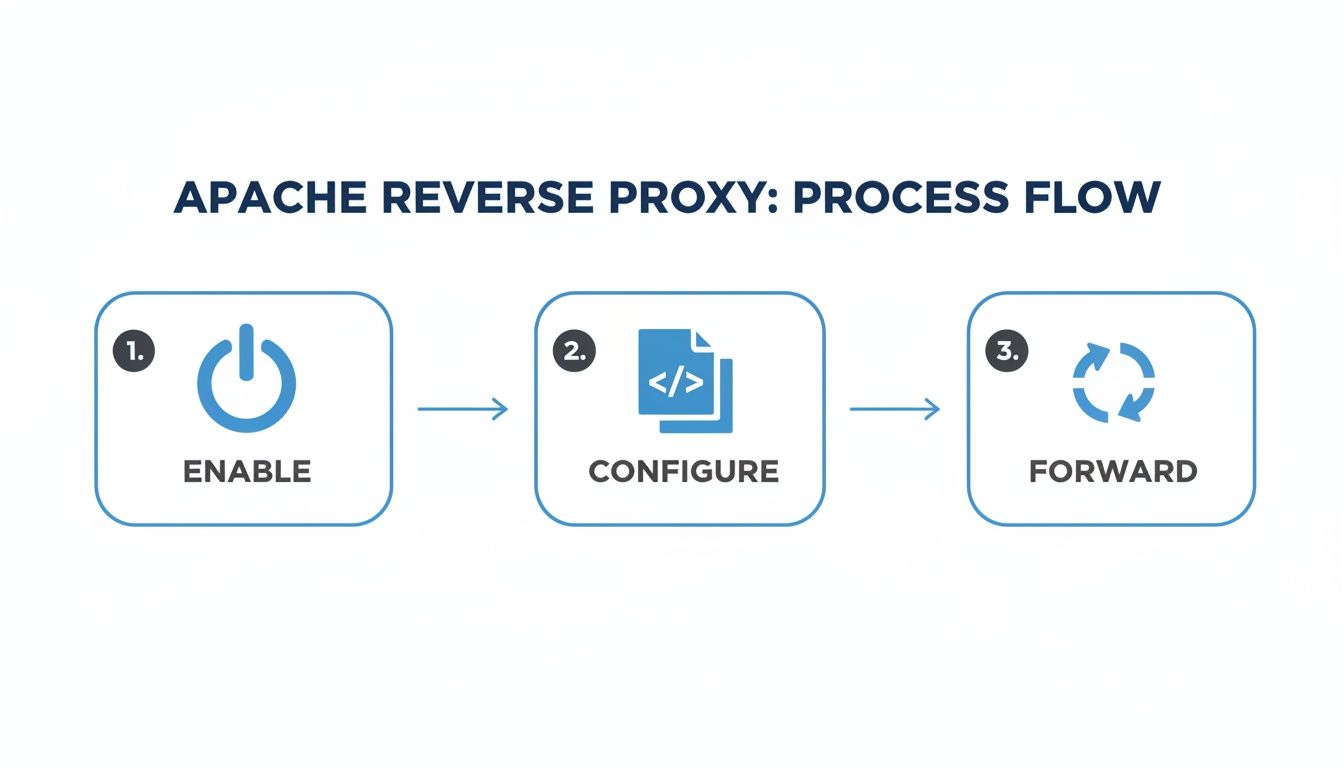
As you can see, it’s a simple three-stage flow. Enabling the right modules, getting the directives configured, and forwarding traffic are the core building blocks for any Apache proxy.
Here’s a bare-bones configuration for a secure VirtualHost doing TLS termination:
<VirtualHost *:443> ServerName yoursecure.domain.com
# SSL Configuration
SSLEngine on
SSLCertificateFile /etc/ssl/certs/yourdomain.crt
SSLCertificateKeyFile /etc/ssl/private/yourdomain.key

# Proxy Configuration
ProxyPreserveHost On
ProxyPass / http://localhost:3000/
ProxyPassReverse / http://localhost:3000/
The three essential SSL directives here are:
SSLEngine on: This is the master switch that activates TLS/SSL processing for thisVirtualHost.SSLCertificateFile: Points to your public SSL certificate file.SSLCertificateKeyFile: Points to the private key that goes with your certificate.
Informing Your Backend About Secure Connections
When you offload TLS termination, you create a subtle but critical problem: your backend application no longer has any idea the original request was secure. It just sees a plain HTTP request coming from the proxy. This can cause all sorts of weird behavior, like your app generating http:// links in its responses instead of https:// links.
To fix this, the proxy has to give the backend a heads-up about the original protocol.
The standard way to do this is with the
X-Forwarded-Protoheader. The proxy adds this header and sets it tohttpsto let the backend app know the client’s connection was secure, even though the proxy-to-backend connection is plain HTTP.
You can add this header using Apache’s mod_headers module, which you’ll also want to make sure is enabled. The RequestHeader directive lets you tack on headers to the request before it’s sent off to the backend.
Here’s the updated configuration with the necessary header:
<VirtualHost *:443> ServerName yoursecure.domain.com
# SSL Configuration
SSLEngine on
SSLCertificateFile /etc/ssl/certs/yourdomain.crt
SSLCertificateKeyFile /etc/ssl/private/yourdomain.key

# Forward the protocol information
RequestHeader set X-Forwarded-Proto "https"

# Proxy Configuration
ProxyPreserveHost On
ProxyPass / http://localhost:3000/
ProxyPassReverse / http://localhost:3000/
With this final piece in place, your backend application framework (whether it’s Express.js, Django, Rails, or something else) can be configured to trust the X-Forwarded-Proto header. It now understands the true nature of the original user request, keeping your application logic consistent and secure.
Scaling Applications with Load Balancing and Caching

Running your application on a single backend server is a ticking time bomb. One server outage—whether it’s planned maintenance or an unexpected failure—and your entire application goes dark. This is where your Apache web server reverse proxy really starts to shine, transforming from a simple gateway into a smart traffic controller.
Load balancing is the key. By distributing incoming requests across a pool of backend servers, you eliminate that single point of failure. It’s also how you scale. As traffic ramps up, you can just add more servers to the pool, ensuring your application stays fast and available for everyone.
Putting Load Balancing into Action with mod_proxy_balancer
Getting started is surprisingly straightforward. You’ll need to enable Apache’s mod_proxy_balancer and mod_lbmethod_byrequests modules. With those active, you can define a “balancer group” right inside your VirtualHost configuration, which is just a fancy name for a pool of your backend servers.
Instead of directing ProxyPass to one server, you point it to this new balancer group. Apache handles the rest, automatically routing requests across all the servers in the group.
Let’s say you have two backend instances running on ports 3001 and 3002. Here’s how you’d set up a balancer group called myappcluster to manage them:
<Proxy balancer://myappcluster> BalancerMember http://localhost:3001 BalancerMember http://localhost:3002
ProxyPass / balancer://myappcluster/ ProxyPassReverse / balancer://myappcluster/
That’s it. With this configuration, Apache will start distributing requests between the two servers using a round-robin method. It’s a simple change that massively boosts your application’s reliability.
One of the best parts of this setup is how easy it makes maintenance. Need to update a server? Just disable it in the balancer. Apache will stop sending it traffic, allowing you to work without causing any user-facing downtime.
Choosing the Right Balancing Method
Apache gives you more control than just a simple round-robin approach. You can pick different schedulers to match your specific workload. A few of the most useful options are:
byrequests: This is the default. It aims to give each backend server an equal number of requests, which is perfect when your servers are all more or less identical.bybusyness: This one is a bit smarter. It sends new requests to the server that’s currently the least busy (has the fewest active requests). This is great for applications with long-running or resource-heavy tasks.bytraffic: This scheduler distributes the load based on the actual I/O traffic (in bytes) each server is handling.
You can set the balancing method right inside the <Proxy> block, letting you fine-tune your setup for optimal performance.
Boosting Performance with Caching
Beyond just managing traffic, your Apache web server reverse proxy can deliver a serious speed boost with caching. By enabling mod_cache, you can tell Apache to save copies of responses from your backend.
When a user asks for a static file—like a logo, CSS file, or a common JavaScript library—that’s already in the cache, Apache can serve it up instantly without ever bothering your application servers. This not only makes things faster for the user but also dramatically reduces the load on your backend.
To set this up, you’ll use directives like CacheEnable and CacheRoot to tell Apache what to cache and where to store it. You can get really granular here, setting rules for specific paths or content types.
For example, you could easily configure Apache to cache all your images for one hour:
CacheEnable disk /images CacheRoot /var/cache/apache2/mod_cache_disk CacheHeader On CacheDefaultExpire 3600
This snippet tells Apache to use a disk cache for any request under the /images path and to consider those assets fresh for 3600 seconds.
While Nginx has certainly carved out a large slice of the market, Apache’s robust module ecosystem makes it a powerhouse for complex reverse proxy setups. For teams that rely on advanced testing, an Apache proxy is invaluable for building realistic staging environments. This kind of setup is also perfect for validating new code by capturing and replaying real user traffic. In fact, you can learn more about how to replay production traffic for realistic load testing in our detailed guide.
By combining the reliability of load balancing with the speed of caching, your Apache reverse proxy becomes the high-performance heart of your application infrastructure.
Hardening Security and Troubleshooting Common Issues
Think of your Apache web server reverse proxy as the front door to your entire application. Just like you wouldn’t leave your front door unlocked, you can’t leave your proxy unhardened. A well-configured proxy does more than just shuttle traffic back and forth; it actively stands guard, defending your backend services from the wild west of the internet.
This is where we move past the basic setup and start forging a resilient, hardened gateway. One of the quickest wins here is implementing robust security headers. These are simple directives Apache sends back to the user’s browser, telling it how to behave and protecting it from common attacks like cross-site scripting (XSS) and clickjacking. For this, mod_headers is your best friend.
A few extra lines in your VirtualHost configuration can dramatically boost your security posture. This isn’t just checking a box for “best practices”—it’s a foundational part of modern web defense.
Implementing Essential Security Headers
Let’s zoom in on two of the most effective headers you can add: HTTP Strict Transport Security (HSTS) and Content Security Policy (CSP).
HSTS is a powerhouse for stopping protocol downgrade attacks and cookie hijacking. It essentially tells a browser, “From now on, only talk to me over HTTPS.” Even if a user accidentally types http://, the browser will automatically upgrade the connection to a secure one.
Here’s what a typical HSTS header looks like in your config:
Header always set Strict-Transport-Security “max-age=63072000; includeSubDomains”
That one line locks in HTTPS for two years and extends the policy to all your subdomains. Easy, right?
A Content Security Policy, on the other hand, is a bit more involved but gives you fine-grained control over what resources (like scripts, images, and stylesheets) a browser is allowed to load. A tight CSP can stop many injection-style attacks cold.
Preventing Information Leakage
Out of the box, Apache can be a little too chatty, revealing its version number and other server details in its response headers. This is basically a freebie for attackers, helping them find known vulnerabilities. Good security means plugging these information leaks.
You can quiet it down with two simple directives in your main Apache configuration file:
ServerTokens Prod: This tells Apache to only return “Apache” in theServerheader, hiding the specific version number and loaded modules.ServerSignature Off: This removes the server information from the footer of server-generated pages, like 404s or other errors.
These small tweaks make it much harder for automated scanners to profile your system, adding a simple but effective layer of obscurity.
Key Takeaway: A secure reverse proxy is a quiet one. By minimizing the information it gives away and enforcing strict browser policies with headers, you make your infrastructure a much tougher target.
Decoding Common Proxy Errors
Even the most buttoned-up systems have bad days. When your reverse proxy starts throwing errors, knowing what they mean is half the battle. Your first stop should always be Apache’s error logs—they are the ground truth for what’s actually going wrong.
Here’s a quick field guide to the errors you’ll see most often:
-
502 Bad Gateway: This is the classic. It means Apache successfully reached your backend, but the backend sent back a garbled or invalid response. This almost always points to an issue with the application server itself—maybe it crashed, is overloaded, or is just plain misconfigured.
-
503 Service Unavailable: This one’s simpler. It means Apache couldn’t connect to the backend at all. The usual culprits are a downed backend service, a firewall blocking the port, or a simple typo in the
ProxyPassdirective in your config. -
504 Gateway Timeout: You’ll hit this when your backend is taking too long to think. Apache has a built-in timer, and if the application doesn’t respond in time, the proxy gives up. This often signals an overloaded database, a slow API call, or a long-running process that needs a serious performance tune-up.
Troubleshooting always, always, always starts with the logs. Correlating the access_log with the error_log will help you connect a user’s request to a specific failure, turning a vague error code into a concrete problem you can actually solve.
Validating Your Setup with GoReplay Traffic Mirroring
You’ve configured your Apache web server reverse proxy, hardened the security, and even set up load balancing. On paper, it looks perfect. But the real question is, how will it hold up under the chaotic, unpredictable pressure of real-world user traffic? Pushing a new configuration live without a proper stress test is a recipe for a bad day, often leading to performance bottlenecks or weird errors at the worst possible time.
This is exactly where traffic mirroring with GoReplay becomes your secret weapon. It gives you a powerful way to de-risk the entire deployment by capturing live production traffic and replaying it against your new staging environment. You get to see precisely how your proxy handles authentic user behavior—with all its quirks—before a single real user is affected.
Capturing Real Production Traffic
First things first, you need to listen to the traffic on your production server. GoReplay is brilliant for this because it works by passively capturing network packets, which means it adds almost no overhead and won’t mess with your live services. All you need is a simple gor command to start a listener on a specific network interface and port, saving everything it sees to a file.
Let’s say you want to capture all the HTTP traffic hitting your main web server on port 80. The command is refreshingly simple:
gor listen :80 --output-file requests.gor
That’s it. This one command tells GoReplay to start listening for all traffic on port 80 and dump it into a file named requests.gor. You can let this run for a few hours during a typical peak period to gather a truly realistic dataset for your test.
This isn’t a synthetic load test guessing at user behavior; you’re using the real thing. It’s the ultimate confidence check, validating everything from caching effectiveness and load balancing logic to how your security headers are applied under genuine conditions.
Replaying Traffic Against Your Staging Proxy
Once you’ve captured a good chunk of traffic in your requests.gor file, move it over to a machine that can access your staging environment. This staging setup should be a mirror image of your intended production environment, with your shiny new Apache reverse proxy sitting right in front of your backend application servers.
Now for the fun part. You can use GoReplay to “replay” that captured traffic against your staging proxy. The command is just as straightforward as the capture one:
gor replay :8080 --input-file requests.gor
This command instructs GoReplay to read from the requests.gor file and fire off all that traffic to port 8080 on the local machine—where your staging Apache proxy is listening. GoReplay even preserves the original timing and sequence of the requests, creating an incredibly realistic simulation of your production load.
Analyzing the Results for a Production-Ready Setup
As the traffic replay runs, your job is to be an observer. Keep a close eye on your Apache access and error logs on the staging proxy. Watch the CPU and memory usage of both the proxy and the backend servers. This is your chance to get answers to some critical questions:
- Is the load balancer doing its job? Check the logs on your backend servers to confirm that requests are being spread out according to the method you chose.
- Is the cache actually caching? You should see a noticeable drop in requests hitting your backend for static assets after the first few hits.
- Are any unexpected errors popping up? Be on the lookout for
502,503, or504errors. They can be a sign that your backend is struggling or that a proxy configuration is slightly off.
This whole process is a form of shadow testing, a powerful technique that validates changes with real traffic without putting users at risk. By using GoReplay to mirror and replay traffic, you move from hoping your configuration is solid to knowing it is. It’s the final, crucial step to ensure your Apache web server reverse proxy is not just configured correctly, but is truly built to perform under pressure.
Ready to eliminate deployment risks and test with real user traffic? GoReplay is the open-source tool that makes it possible. https://goreplay.org