Apache Web Server Load Balancing Guide

When you hear “load balancing,” you might think of expensive hardware or complex cloud services. But for years, one of the most reliable and battle-tested tools for the job has been right under our noses: the Apache HTTP Server.
It’s not just a web server; it’s a powerful traffic cop for your applications. Using its built-in modules, particularly mod_proxy_balancer, Apache can intelligently distribute incoming requests across multiple backend servers, making sure no single one gets buried in traffic. This is the bedrock of building a resilient and scalable web architecture.
So, Why Stick with Apache for Load Balancing?
Before we get into the nuts and bolts of the configuration, let’s talk about why Apache is still a fantastic choice for this. At its heart, a load balancer’s job is simple: it sits between your users and your application servers, playing traffic director. This one function is what separates a fragile application from one that can handle the pressures of the real world.
When you set up load balancing with Apache, you’re not just tacking on another piece of tech—you’re fundamentally making your entire setup more robust. The payoff is immediate and significant.
The Real-World Wins of Apache Load Balancing
-
You Stay Online: If a backend server crashes (and they always do, eventually), Apache’s health checks will spot it instantly. It’ll stop sending traffic that way and route users to the healthy servers. No frantic late-night calls, no customer complaints. Your app just keeps running.
-
Handle Any Traffic Spike: That big marketing push or viral moment you’ve been hoping for? It can crush a single server. With Apache, you can just spin up a few more backend instances and add them to the pool. Apache immediately starts sharing the load, letting you scale out when you need it most.
-
A Faster Experience for Everyone: By spreading the work around, you prevent any one server from getting bogged down. That means faster response times and quicker page loads for your users—a critical factor for keeping them happy and engaged.
The secret sauce here is Apache’s modular design. Everything hinges on two key modules: mod_proxy, which gives Apache its reverse proxy powers, and mod_proxy_balancer, which adds the smarts for distributing traffic. Together, they create a seriously effective system for managing requests.
Think of Apache as the public face of your application. It becomes the single point of contact, taking all incoming requests and discreetly passing them to a team of identical backend servers. Your infrastructure becomes stronger and more scalable, all without exposing your internal network.
This isn’t just a theory; it’s a strategy proven in production for decades. The Apache HTTP Server has been a workhorse of the web since the beginning, and its load balancing capabilities are a big reason why it’s still so relevant. In fact, data from W3Techs shows Apache is still used by 25.1% of all websites with a known web server, a testament to its reliability for handling high-traffic applications.
Your First Load Balancer With Mod Proxy Balancer
Diving into Apache configuration files can seem intimidating, but spinning up your first load balancer is surprisingly straightforward. We’ll be using Apache’s built-in tools for this: mod_proxy and its powerful sidekick, mod_proxy_balancer. The whole idea is simple: you tell Apache about a pool of backend servers, and it handles the job of spreading the traffic out among them.
First things first, you have to make sure the right modules are enabled. On Debian-based systems like Ubuntu, this is usually a quick command. On other systems, you might just need to uncomment a few lines in your main httpd.conf file. The modules you absolutely need are mod_proxy, mod_proxy_http (for handling HTTP traffic), and of course, mod_proxy_balancer.
This diagram breaks down how a request flows through the system. It’s a great visual for understanding how the Apache load balancer sits in the middle, directing traffic and protecting your backend servers from direct exposure.
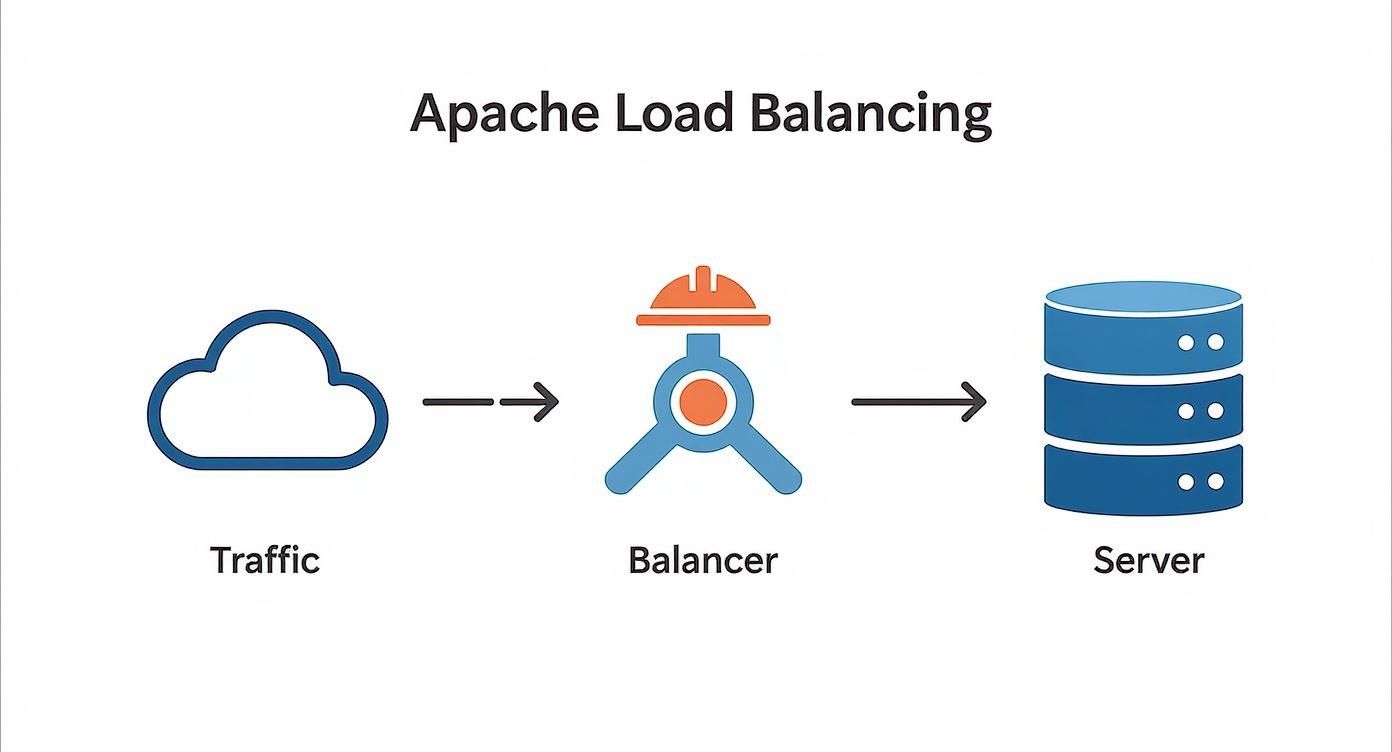
As you can see, the load balancer acts as a central traffic cop, simplifying your architecture and keeping things organized.
Building Your Balancer Configuration
Once the modules are active, the real magic happens inside your VirtualHost configuration. This is where you’ll define your pool of servers—known as a balancer group—and lay down the rules for how traffic gets routed.
Let’s say you have two backend application servers. You’ll start by defining a balancer cluster and then add each server to it as a BalancerMember. This creates a logical group that Apache can work with.
Here’s what a practical, no-fluff configuration looks like inside a <VirtualHost> block:
<VirtualHost *:80> ServerName your-app.com
<Proxy balancer://mycluster>
    BalancerMember http://app-server-1.internal:8080
    BalancerMember http://app-server-2.internal:8080
    ProxySet lbmethod=byrequests
</Proxy>

ProxyPreserveHost On
ProxyPass / balancer://mycluster/
ProxyPassReverse / balancer://mycluster/
In this snippet, we’ve created a balancer named mycluster and added our two servers. The ProxyPass directive is the key—it tells Apache to forward all incoming requests for the root path (/) directly to this balancer group. It’s a clean, effective way to get up and running.
Achieving Session Stickiness
Okay, spreading traffic evenly is great, but what about when a user needs to stay on the same server for their entire visit? This is a huge deal for applications that rely on local session data, like an e-commerce shopping cart. This is where session stickiness (or session affinity) saves the day.
You can tell mod_proxy_balancer to use a cookie to remember which server a user was sent to. The next time that user sends a request, Apache spots the cookie and routes them right back to the same backend, ensuring their session remains intact.
Enabling this is as simple as adding one more ProxySet line to your balancer config:
<Proxy balancer://mycluster>
BalancerMember http://app-server-1.internal:8080
BalancerMember http://app-server-2.internal:8080
ProxySet lbmethod=byrequests
# This is the line for session stickiness
ProxySet stickysession=JSESSIONID
Here, stickysession=JSESSIONID tells the balancer to key off a cookie named JSESSIONID, which is common in Java apps. You’d just swap JSESSIONID with whatever session cookie your own application uses. It’s an incredibly powerful feature for any stateful application.
Key Takeaway: Without session stickiness, a user might add an item to their cart on Server A, but their next click could send them to Server B, where their cart is suddenly empty. For most modern web apps, implementing stickiness isn’t just a nice-to-have; it’s essential.
Implementing Automatic Health Checks
A load balancer is only as good as its ability to know which servers are actually alive. Sending traffic to a dead server is a surefire way to get error pages and unhappy users. Luckily, mod_proxy_balancer includes built-in health checks that can automatically pull a failing server from the rotation.
You can set health check parameters right on the BalancerMember lines. This gives you fine-grained control over how Apache decides if a server is healthy.
Let’s look at an expanded configuration with a couple of useful parameters:
retry=30: If Apache marks a server as down, it will wait 30 seconds before trying to connect again.timeout=5: It will only wait 5 seconds for a connection to a backend server to succeed before giving up.
Here’s how you would apply these settings to your balancer members:
<Proxy balancer://mycluster>
BalancerMember http://app-server-1.internal:8080 retry=30 timeout=5
BalancerMember http://app-server-2.internal:8080 retry=30 timeout=5
# … other settings
With this setup, if app-server-1 suddenly stops responding, Apache will stop sending it traffic almost immediately. It will then ping the server every 30 seconds. As soon as the server comes back online and responds, Apache will seamlessly add it back into the pool. This kind of automated failover is fundamental to building a truly high-availability system.
Choosing The Right Load Balancing Algorithm
Picking a load balancing strategy isn’t just a technical box to check; it’s a decision that directly shapes your application’s performance and stability. The method you choose in mod_proxy_balancer is the brain of the operation, dictating how Apache hands out traffic. Get it wrong, and you can easily end up with overloaded servers while others are just sitting idle.
It’s all about matching the traffic-cop’s rules to the actual flow of traffic. Apache gives you a few different ways to do this, and each one is built for a specific kind of job. Let’s break down the most common methods so you can figure out which one makes sense for your setup.
By Requests: The Simple Round Robin
The default and most straightforward algorithm is byrequests. It works on a simple round-robin principle: the first request goes to Server A, the second to Server B, the third back to Server A, and so on. It just cycles through the list of available servers, giving each one an equal slice of the pie.
This method is perfect in one specific, yet common, scenario: when all your backend servers have identical hardware and are handling similar types of requests. If every task takes roughly the same amount of time, byrequests ensures a beautifully even distribution.
But that simplicity is also its biggest weakness. If one request kicks off a long-running, resource-hungry process, byrequests has no idea. It will happily keep sending new requests to that struggling server, creating a bottleneck while other servers are under-used.
By Busyness: The Smart Choice For Mixed Workloads
When you have a mix of fast and slow requests, bybusyness is almost always the better choice. Instead of just blindly cycling through servers, it acts like a “least connections” algorithm. Before it routes a request, it checks which backend server is currently handling the fewest active connections and sends the new traffic there.
This intelligent approach is a lifesaver in environments where some requests are quick (like grabbing a user profile) while others are slow (like generating a big report). The bybusyness method makes sure that those long-running tasks don’t hog a server that could be knocking out dozens of faster requests in the meantime.
Expert Insight: Think of
bybusynesslike a supermarket checkout. You don’t just go to the next available cashier in order; you instinctively look for the shortest line. This gets everyone through faster and ensures no single cashier is overwhelmed—that’s exactly how this algorithm optimizes your server resources.
By Traffic: Weighted Distribution For Mixed Hardware
What if your backend servers aren’t all the same? Maybe you have a beefy new machine working alongside a couple of older, less powerful ones. Sending them all an equal number of requests with byrequests would quickly crush the older hardware. This is where bytraffic comes to the rescue.
This algorithm uses a weighted round-robin approach. You assign a “load factor” or weight to each BalancerMember, telling Apache exactly how much traffic it should get compared to the others.
For example, imagine a setup like this:
- Server A (Powerful):
loadfactor=3 - Server B (Standard):
loadfactor=1 - Server C (Standard):
loadfactor=1
With this configuration, for every five requests, Server A will handle three of them, while Servers B and C will each get one. This lets you fine-tune traffic distribution to perfectly match your hardware’s capabilities, squeezing maximum efficiency out of your entire server pool.
Comparison of Apache Load Balancing Algorithms
To make the choice clearer, it helps to see the main algorithms side-by-side. Each one serves a distinct purpose, and knowing their strengths is key to building a resilient architecture.
| Algorithm (lbmethod) | Distribution Logic | Best For | Example Use Case |
|---|---|---|---|
| byrequests | Simple Round Robin | Environments with identical servers and uniform request types. | A pool of identical web servers serving static content or simple API lookups. |
| bybusyness | Least Connections | Environments with mixed request complexity (short and long tasks). | A web application that serves both quick data fetches and slow report generation. |
| bytraffic | Weighted Round Robin | Environments with servers of varying hardware capabilities. | A server farm with a new, powerful machine alongside older, less capable ones. |
Ultimately, the best algorithm depends entirely on your specific workload and infrastructure.
Before you roll out any changes, you have to validate that your chosen strategy can actually handle real-world pressure. A great first step is boosting application performance through effective load testing, as this will tell you if your chosen algorithm holds up when things get busy. By analyzing your traffic patterns and server capabilities, you can confidently select a method that guarantees high availability and a rock-solid experience for your users.
Fortifying and Tuning Your Load Balancer
With your basic Apache load balancer up and running, it’s time to get it ready for the real world. A production environment demands two things above all else: security and performance. That means locking down traffic with HTTPS and squeezing every last drop of speed out of your setup.
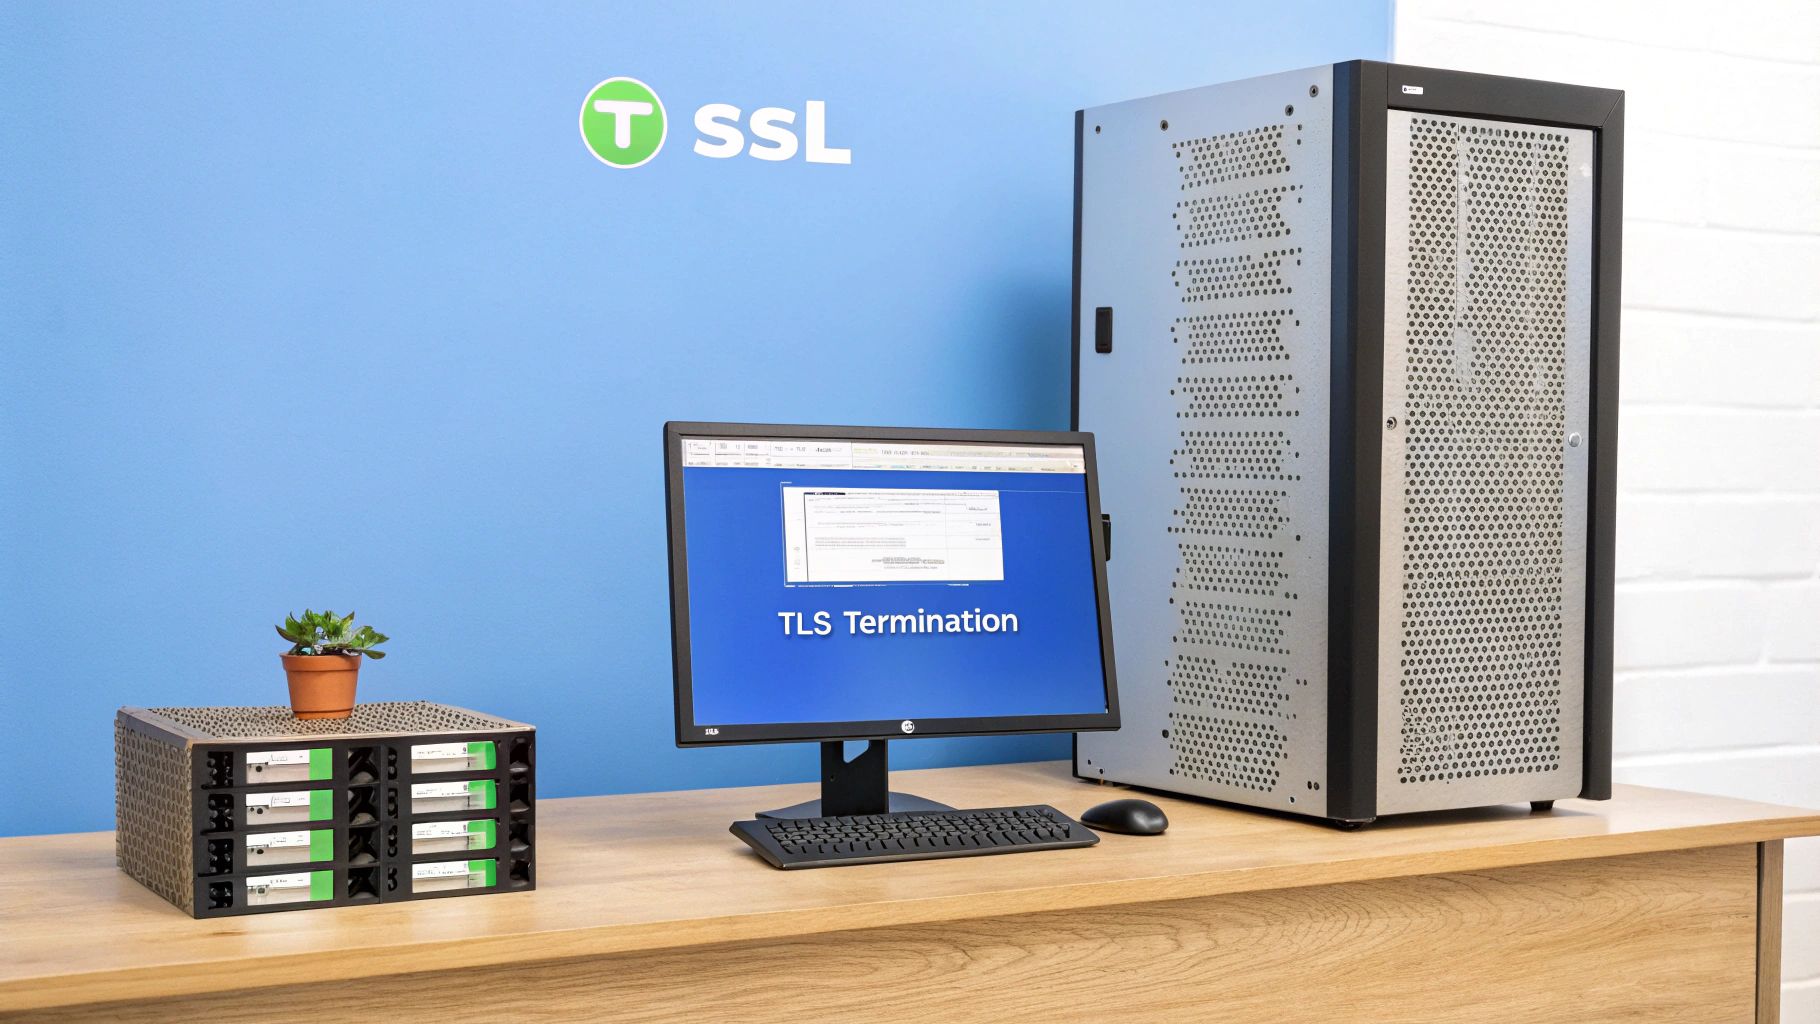
This is where SSL termination becomes your most important tool.
Instead of forcing every backend server to juggle its own encryption, you let the Apache load balancer do all the heavy lifting. It handles the incoming HTTPS traffic, decrypts it, and forwards it as plain, unencrypted HTTP to your internal servers. This centralizes the entire cryptographic workload right at the edge.
This strategy pays off in several huge ways:
- Slashed CPU Load: SSL/TLS handshakes are processor-intensive. By offloading this work, your application servers are free to do what they do best: serve application logic.
- Simplified Certificate Management: You manage one SSL certificate on the load balancer. That’s it. No more chasing down expiring certs on every single backend machine.
- A Stronger Security Posture: Your internal network is shielded. Traffic between the load balancer and backend servers stays behind your firewall, keeping your internal infrastructure simple and secure.
Configuring SSL Termination in Apache
To get this going, you’ll set up a VirtualHost that listens specifically on port 443 (the HTTPS standard). This requires you to have mod_ssl enabled along with your other proxy modules.
Here’s a real-world example of what that <VirtualHost> block looks like. It’s set up to listen for secure connections, decrypt the traffic, and then pass it along to the mycluster balancer group we configured earlier.
<VirtualHost *:443>
    ServerName your-app.com

    # SSL Configuration Directives
    SSLEngine on
    SSLCertificateFile "/path/to/your_domain.crt"
    SSLCertificateKeyFile "/path/to/your_private.key"

    # Proxying to the balancer
    ProxyPreserveHost On
    ProxyPass / balancer://mycluster/
    ProxyPassReverse / balancer://mycluster/

    # Add headers to inform backend of original protocol
    RequestHeader set X-Forwarded-Proto "https"
</VirtualHost>
Pay close attention to that RequestHeader set X-Forwarded-Proto "https" line. It’s absolutely critical. It injects a header that tells your backend application, “Hey, the original connection from the user was secure,” which many apps need to function correctly.
Key Takeaway: By terminating SSL at the load balancer, you create a clean separation of concerns. The load balancer acts as your security gatekeeper, while your application servers can focus purely on running your app.
Fine-Tuning Apache for Peak Performance
With security locked down, let’s turn our attention to speed. A default Apache installation is rarely optimized for the kind of high-concurrency work a load balancer does. A few targeted tweaks can make a massive difference.
Switch to a Better Multi-Processing Module (MPM)
Apache’s default MPM is usually prefork, a reliable but inefficient process-per-request model. It’s a memory hog when you’re handling tons of simultaneous connections. For a load balancer, you’ll get far better results by switching to either the Worker or Event MPM.
- Worker MPM: Uses threads within each process, letting it handle more connections with much less memory.
- Event MPM: An evolution of Worker, it uses a dedicated listener thread to manage connections. This makes it incredibly efficient at handling idle
KeepAliveconnections.
For any modern load balancer, the Event MPM is the clear winner. It’s built for exactly these kinds of high-concurrency scenarios.
Dial in Your KeepAlive Settings
The KeepAlive directive is a game-changer. It allows multiple requests to fly over a single TCP connection, slashing the overhead of setting up new connections for every little asset. But the default settings can be a bit too generous.
Tweak these settings in your httpd.conf for a good balance:
KeepAlive On: You almost always want this enabled.MaxKeepAliveRequests 100: A solid starting point, allowing 100 requests before a connection is recycled.KeepAliveTimeout 5: This is the big one. A lower timeout, like 5 seconds, prevents idle connections from tying up server resources that could be serving active users.
Cache Static Assets on the Edge
If your application serves static content—images, CSS, JavaScript—you can get a huge performance win by caching it directly on the load balancer. Using mod_cache, Apache can store these files in memory or on disk after the first request.
From then on, any request for that same file gets served instantly from the cache. It never even has to bother your backend servers. This lightens the load on your application tier and makes your pages load noticeably faster for users. In effect, you’re turning your load balancer into a mini-CDN.
Monitoring Health and Troubleshooting Common Issues
Once your Apache load balancer is up and running, the job isn’t over. It’s just shifted from configuration to observation. A load balancer left to its own devices is a ticking time bomb—silent failures can easily cascade through your entire application stack. Fortunately, with the right approach, you can spot and squash problems long before they ever reach your users.

This is where Apache’s built-in balancer-manager becomes your best friend. It’s a simple but surprisingly powerful web dashboard that gives you a real-time, at-a-glance view of your entire server pool’s health. You can instantly see which nodes are active, which are in an error state, and exactly how traffic is being distributed among them.
Activating the Balancer Manager
To get this essential tool working, you’ll need to add a new Location block to your Apache configuration. I usually place it within the same VirtualHost that defines the load balancer itself. This block simply creates a specific URL endpoint that will serve up the dashboard.
Security is paramount here. You absolutely must restrict access to this page, allowing connections only from trusted IP addresses, like your office network or a dedicated admin machine.
Here’s a boilerplate config to enable the manager at the /balancer-manager path:
<Location /balancer-manager>
    SetHandler balancer-manager
    Require ip 192.168.1.0/24
    Require ip 127.0.0.1
</Location>
After adding this and reloading Apache, just browse to http://your-app.com/balancer-manager to see the status page. It’s a no-frills HTML interface, but it holds all the critical info you need to manage your balancer members on the fly.
Navigating Common Troubleshooting Scenarios
Even with solid monitoring, things will eventually break. Knowing what to look for is half the battle. Let’s walk through a few of the most common headaches you’ll run into with an Apache load balancing setup.
One of the first errors you’ll likely see is the dreaded 503 Service Unavailable. This is Apache’s way of saying it tried to pass a request along, but none of the backend servers in the pool were healthy enough to take it. This usually points to one of two culprits:
- All your backend servers are down or failing health checks. Your first move should be to check the
balancer-managerdashboard. If all the members are red-flagged with “Err” or “Down,” the problem isn’t the load balancer—it’s your application servers. - A network or firewall issue is blocking the connection. Make sure the load balancer can actually reach the backend servers on their designated ports. A forgotten firewall rule is a surprisingly common cause of this.
Another tricky one is when session stickiness suddenly stops working. Users might complain that their shopping cart empties on its own or they keep getting logged out. This almost always points to a mismatch with the sticky session cookie.
Key Insight: The
stickysessioncookie name you define in your Apache config has to exactly match the session cookie name your backend application is generating. Any difference, even a case change, will break stickiness, causing Apache to send the user to a new server on their next request.
Digging Deeper with Apache Logs
When the balancer-manager dashboard doesn’t give you the full story, your next stop should always be the Apache logs. The error_log and access_log are your primary sources of truth. The error_log, in particular, is a goldmine for diagnosing backend connection failures.
Keep an eye out for messages like (111)Connection refused or proxy: BALANCER: All worker nodes are in error state. These are dead giveaways that Apache can’t talk to one or more of your BalancerMember servers. For more advanced, real-time traffic analysis, you can also look into specialized tools. For instance, you can learn more about effective network traffic monitoring to get a much deeper view into your application’s behavior under load.
By combining the live feedback from the balancer-manager with the forensic detail in your logs, you can systematically track down and resolve just about any issue your Apache load balancer throws at you.
Common Questions About Apache Load Balancing
Even with a rock-solid configuration, you’re always going to have questions when adding a new piece to your architecture. Setting up Apache load balancing is no different. Let’s go over some of the most common questions I hear, so you can master the key concepts and dodge the usual pitfalls.
Getting these details right is what separates a basic, textbook setup from one that’s truly production-ready. The goal is to build an architecture you can trust, and that starts with understanding the “why” behind the “how.”
Can Apache Load Balance Non-HTTP Traffic?
This one comes up a lot. While Apache’s mod_proxy is an absolute beast for HTTP and HTTPS, it can do more. It competently handles WebSocket traffic with the mod_proxy_wstunnel module, which is a must-have for modern real-time apps. It also speaks AJP, making it a natural choice for load balancing backend Java application servers like Tomcat.
But Apache really shines at Layer 7 (the application layer). This is where it can make smart routing decisions based on things like HTTP headers, URLs, and cookies. For raw TCP load balancing—say, for a database or an MQTT broker—you’re generally better off with a dedicated Layer 4 tool like HAProxy or Nginx’s stream module. They’re just more direct and efficient for that kind of job.
What Is The Difference Between a Reverse Proxy and a Load Balancer?
It’s easy to get these two mixed up because they’re so closely related. The simplest way to think about it is that a load balancer is just a more advanced type of reverse proxy.
- A reverse proxy sits in front of one or more web servers and forwards client requests to them. It can handle caching, SSL termination, and act as a single entry point.
- A load balancer does all of that plus the crucial job of distributing those requests across a whole pool of backend servers.
So, while every Apache load balancer is technically a reverse proxy, a simple reverse proxy might just be forwarding traffic to a single server. The load balancer brings traffic distribution algorithms and health checks into the mix.
Key Takeaway: A reverse proxy is the bouncer at the door; a load balancer is the host who intelligently seats guests at different tables to make sure no single table gets overwhelmed. Apache’s
mod_proxy_balancergives you that essential hosting skill.
How Does Apache Handle Failed Backend Servers?
This is where the real magic of high availability happens. Apache’s mod_proxy_balancer has built-in health checks you can configure. It periodically pings each backend server in the pool to make sure it’s alive and kicking.
If a server fails to respond or returns an error, the load balancer immediately marks it as “unhealthy.” It instantly stops sending new traffic to that failed server, routing all incoming requests to the healthy nodes that are still online. For the end user, this failover is completely invisible.
Once the downed server recovers and starts passing its health checks again, Apache automatically brings it back into the active rotation. It’s this automated process that forms the backbone of a truly fault-tolerant system.
Testing how your application handles these real-world failures is critical. With GoReplay, you can capture and replay real production traffic against your staging environment to validate your load balancing strategies. You can ensure session stickiness works under pressure and confirm your failover mechanisms are flawless before they ever see a real user.