Apache Load Balancing: Mastering apache load balancing for High Availability

At its core, Apache load balancing is all about spreading incoming web traffic across a group of backend servers. Using its built-in modules, primarily mod_proxy and its extension mod_proxy_balancer, Apache prevents any single server from getting swamped. This simple act is the key to keeping your web applications highly available and running smoothly, even under heavy load.
Why Apache Is Still a Go-To for Load Balancing

Before we jump into the configuration files, it’s fair to ask: with so many dedicated hardware and cloud-native solutions out there, why stick with Apache?
The answer lies in its incredible flexibility and battle-tested reliability. Apache isn’t just a web server; it’s a powerful, Swiss Army knife for managing traffic. For teams already running Apache, using its built-in modules is often the most direct path to a resilient architecture. You can stand up a robust load balancer without adding a whole new piece of tech to your stack, which means less complexity and lower operational overhead. That integrated approach is a massive win.
Practical Benefits in Real-World Scenarios
The real power of Apache’s load balancing shines in everyday situations. Think of it as the perfect front-end for a cluster of application servers, whether they’re running PHP, Java (like Tomcat), or Python. Apache expertly fields all the incoming requests and distributes them, letting the app servers do what they do best: run the application logic.
Another huge benefit is SSL/TLS termination. You can let Apache handle all the encrypted HTTPS traffic from users. It decrypts the requests and passes them along to the backend servers as standard, unencrypted HTTP. This offloads the heavy computational work of encryption from your app servers, boosting their performance and making certificate management a whole lot simpler.
By handling these critical functions, Apache acts as a powerful reverse proxy and gateway, creating a clean separation between the public-facing internet and your private backend infrastructure.
The Modules That Make It Happen
To get the job done, Apache relies on a few core modules working together. Each one has a specific role, from basic proxying to advanced load distribution and health checks.
Core Apache Load Balancing Modules at a Glance
| Module Name | Primary Function | Key Role |
|---|---|---|
mod_proxy | The main proxy module | Enables Apache to act as a forward or reverse proxy for HTTP and other protocols. It’s the foundation. |
mod_proxy_http | HTTP/HTTPS support | Adds the specific capability to proxy HTTP and HTTPS requests. Essential for web traffic. |
mod_proxy_balancer | Load balancing logic | Provides the load balancing capabilities, clustering backend servers into a “balancer” group. |
mod_lbmethod_byrequests | Request-based algorithm | A load balancing algorithm that distributes requests evenly among workers. It’s the default and most common. |
mod_lbmethod_bybusyness | Busyness-based algorithm | An algorithm that sends new requests to the least busy server (the one with the fewest active requests). |
mod_lbmethod_bytraffic | Traffic-based algorithm | Distributes requests based on the amount of I/O traffic each server is handling. |
mod_slotmem_shm | Shared memory provider | Manages shared memory for other modules, crucial for the balancer to keep track of worker states. |
mod_proxy_hcheck | Health checks | Adds the ability to independently check the health of backend servers so bad nodes can be taken out of rotation. |
Understanding how these pieces fit together is the first step toward building a reliable and efficient load-balancing setup.
An Enduring and Widespread Presence
Apache’s longevity is one of its greatest strengths. Its load-balancing features have been proven in countless production environments for well over a decade. Despite new players entering the market, Apache continues to power a huge slice of the internet.
In early 2025, W3Techs still reported Apache running on roughly 26–27% of all websites, a testament to its staying power. You can find more details about the Apache HTTP server’s history and market share on its Wikipedia page.
This massive user base means its modules are incredibly stable, well-documented, and backed by a global community. When you build a solution on Apache, you’re standing on a foundation trusted by millions.
Alright, let’s get down to business. Now that we’ve covered the theory, it’s time to roll up our sleeves and build a working Apache load balancer. This is where we turn your Apache instance into a smart traffic controller for your backend application servers.
First things first, you need to make sure the right modules are active. The heavy lifters here are mod_proxy, mod_proxy_http, and mod_proxy_balancer. If you’re on a Debian-based system like Ubuntu, this is usually a one-liner: a2enmod proxy proxy_http proxy_balancer. On other systems, you might need to pop open your httpd.conf file and uncomment a few lines.
Building the Configuration Block
With the modules ready to go, the next step is to add a configuration block to your virtual host file. This is where you’ll define your “balancer pool”—basically, the group of backend servers that will share the incoming requests.
Here’s a simple, no-fluff example to get you started:
<Proxy balancer://mycluster> # Your backend servers go here BalancerMember http://appserver1.local:8080 BalancerMember http://appserver2.local:8080
# And this is how we'll balance the load
ProxySet lbmethod=byrequests
Now, map a URL to the balancer pool
ProxyPass “/app” “balancer://mycluster/”
ProxyPassReverse “/app” “balancer://mycluster/”
What we’ve done here is create a balancer named mycluster with two backend app servers. Then, we told Apache that any request coming in for the /app path should be handed off to this group. Simple as that.
Breaking Down the Directives
Let’s quickly pull apart what’s happening in that configuration. Each line has a specific job in directing traffic.
<Proxy balancer://mycluster>: This is the container for our server group, which we’ve just namedmycluster. Any settings you place inside this block will apply only to this pool.BalancerMember: Each one of these lines adds a backend server to the pool. You can add as many as you need to handle your traffic.ProxySet lbmethod=byrequests: This is the heart of the operation. It sets the scheduling algorithm. We’re usingbyrequests, which is Apache’s default round-robin method. It just sends requests to each server one by one, keeping things evenly distributed.ProxyPassandProxyPassReverse: These two directives are the bridge between the outside world and your internal balancer.ProxyPasssends the initial request from the user to the balancer pool.ProxyPassReverseis a crucial wingman—it cleans up any redirect headers sent back by the application, so URLs don’t break from the user’s perspective.
The real beauty of this setup is its simplicity. In just a handful of lines, you’ve got a functional, scalable system that distributes traffic. This is the foundation for more advanced features like health checks and sticky sessions.
Apache even provides a handy web interface, the Balancer Manager, for managing your load balancer in real-time. This screenshot from the official Apache documentation shows you what it looks like.
From this screen, you can see the status of each BalancerMember, tweak its parameters, or even take a server offline for maintenance without having to touch a config file or restart Apache.
With this foundational setup complete, you now have a working Apache load balancer. It’s ready for traffic, and you can start building on it with more sophisticated algorithms and reliability features.
Choosing the Right Load Balancing Method
Once you have your basic Apache load balancer up and running, the real fun begins: deciding how it should distribute traffic. The default round-robin approach is a decent starting point, but Apache gives you much smarter algorithms to squeeze the most performance out of your specific setup. Picking the right method is key to using your resources efficiently and giving users the fastest possible response.
Apache’s mod_proxy and mod_proxy_balancer modules are the workhorses here, offering several load-balancing algorithms like byrequests, bytraffic, and bybusyness. This flexibility lets you build a system that intelligently routes traffic across your backend servers.
This simple decision tree can help you figure out where to start.
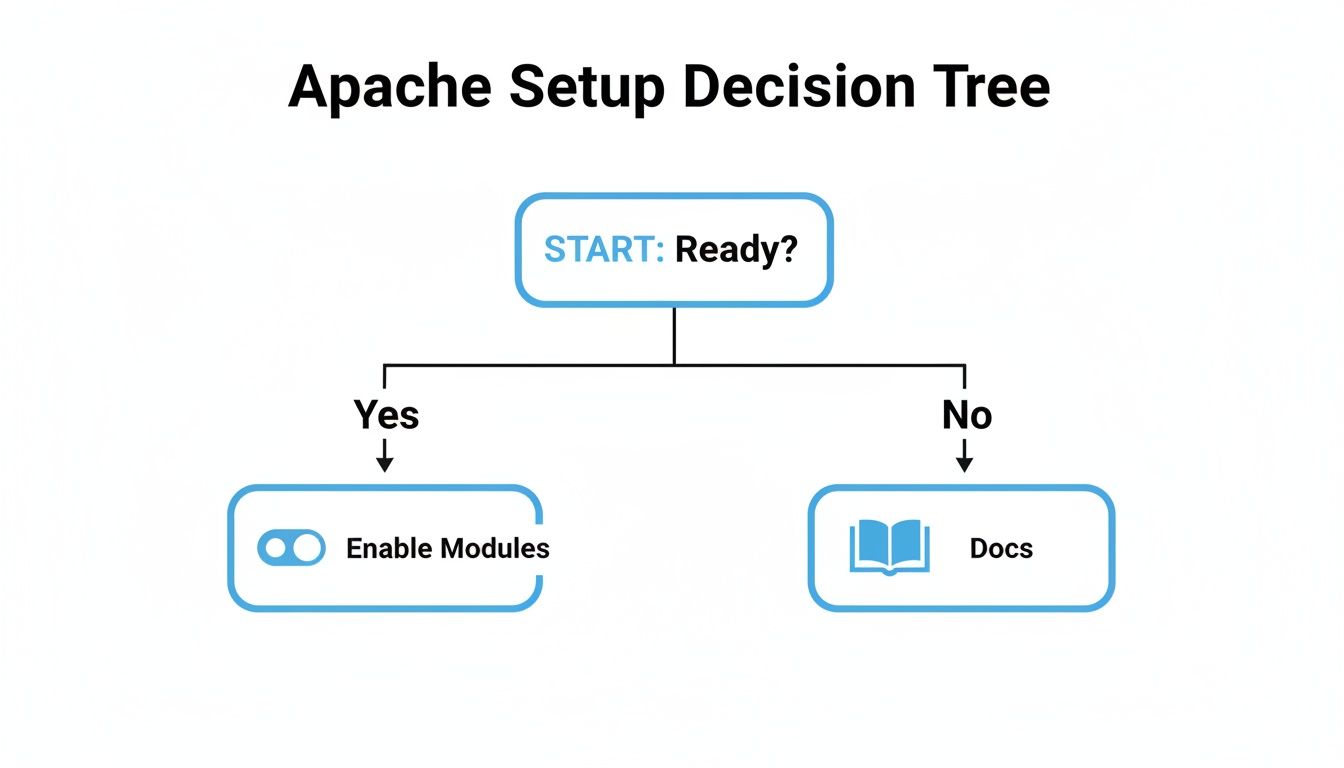
It’s a good reminder of the first rule of any configuration: make sure you’re actually ready to enable the modules before you get lost in the documentation.
Comparison of Apache Load Balancing Algorithms
To help you decide which method fits your application’s needs, here’s a quick comparison of the main load balancing algorithms Apache offers. Each one has a specific strength, so think about your server environment and traffic patterns when making your choice.
| Algorithm | Distribution Method | Best Use Case |
|---|---|---|
byrequests | Round-robin | Homogeneous server environments with similar hardware. |
bytraffic | Weighted round-robin | Environments with a mix of powerful and less powerful servers. |
bybusyness | Least active connections | Applications with long-running tasks or variable processing times. |
Choosing the right algorithm from the start will save you a lot of performance headaches down the road. Let’s dig into how each of these works in a real-world scenario.
Request Counting (byrequests)
The default method, lbmethod=byrequests, is the most straightforward. It works like a dealer handing out cards, sending each new request to the next server in the pool in a simple, circular fashion.
This is a great choice when all your backend servers are more or less identical. If they all have similar hardware specs and can handle a comparable workload, this predictable, even distribution makes it a reliable workhorse.
Be careful, though. If you have a mix of powerful new servers and some older, weaker ones, this method will blindly send the same amount of traffic to all of them, which can easily overload the slower machines.
Weighted Traffic Counting (bytraffic)
If your servers aren’t all created equal, lbmethod=bytraffic is what you need. This method distributes requests based on a loadfactor you assign to each BalancerMember. A server with a higher loadfactor gets a proportionally bigger slice of the traffic pie.
Think of it like this: if Server A has a loadfactor of 50 and Server B has one of 25, Server A will handle twice the I/O traffic. This ensures your beefier hardware does the heavy lifting, leading to a much more balanced and efficient system.
Pending Request Counting (bybusyness)
For the most dynamic approach, look no further than lbmethod=bybusyness. Instead of relying on pre-set weights, it routes each new incoming request to whichever server has the fewest active connections at that very moment.
This method really shines when your application has tasks with wildly different processing times. By always sending new work to the least busy server, you can dramatically cut down response times for those long-running jobs and make sure users aren’t left hanging.
Once you’ve picked your method, you absolutely have to validate it. The only way to know if your configuration can handle a real-world load is to test it. Our guide on effective load testing walks you through the strategies to make sure your setup is truly battle-ready.
Keeping Users Happy: Sticky Sessions and Health Checks

Simply spreading traffic across servers is a solid first step, but real-world applications demand more finesse. What happens when a user fills their shopping cart? If their next click sends them to a different server, that cart might suddenly be empty. This is where sticky sessions and health checks come into play, turning a basic load balancer into a smart, resilient system.
These features are what separate a simple traffic cop from an intelligent gateway. They keep user sessions consistent and automatically sideline failing backend servers without you having to lift a finger, which is absolutely critical for maintaining high availability.
Configuring Sticky Sessions for Uninterrupted Experiences
Sticky sessions, often called session affinity, make sure that all requests from a specific user consistently hit the same backend server. This is a must-have for any stateful application that stores session data locally, like e-commerce sites, online banking portals, or any app with a login.
The most common way to pull this off is with cookies. You can tell Apache to look for a specific session cookie (think PHPSESSID for PHP or JSESSIONID for Java apps) and use its value to “stick” that user to a particular server for their entire visit.
Here’s a look at how to set it up:
<Proxy balancer://mycluster> BalancerMember http://appserver1.local:8080 route=node1 BalancerMember http://appserver2.local:8080 route=node2 ProxySet stickysession=PHPSESSID
Header add Set-Cookie “ROUTEID=.%{BALANCER_WORKER_ROUTE}e; path=/” env=BALANCER_ROUTE_CHANGED
In this setup, we start by giving each BalancerMember a unique route name. Then, the ProxySet stickysession=PHPSESSID line is the key—it tells Apache to use the PHPSESSID cookie to maintain that stickiness. Apache then adds its own ROUTEID cookie to the response, ensuring every subsequent request from that user lands in the right place.
This simple configuration is the difference between a smooth user experience and a frustrating one. It prevents things like mysteriously empty shopping carts or unexpected logouts. It’s a small change with a massive impact on your application’s stability.
Setting Up Automated Health Checks
So, what happens if one of your backend servers suddenly goes offline? Without health checks, your Apache load balancer would just keep sending traffic its way, leading to a cascade of errors for your users. Not good.
Health checks are the solution. They have Apache periodically ping each backend server to make sure it’s alive and well. If a server doesn’t respond correctly, Apache automatically and temporarily yanks it from the rotation until it’s healthy again.
You can enable health checks with parameters like hcmethod, hcexpr, and hcuri in your configuration.
hcmethod: The HTTP method for the check (usuallyGETorHEAD).hcuri: A dedicated path for the check, like a/health-checkendpoint.hcexpr: A name for a health check expression that defines what a “successful” response looks like.
First, you’ll define your health check rules with ProxyHCTemplate:
ProxyHCTemplate ok200 “hcmethod=GET hcuri=/health hcinterval=10 hcfails=3 hcpasses=2”
Then, you just apply that template to your balancer members:
<Proxy balancer://mycluster> BalancerMember http://appserver1.local:8080 hctemplate=ok200 BalancerMember http://appserver2.local:8080 hctemplate=ok200 # … other settings
This configuration tells Apache to send a GET request to the /health endpoint every 10 seconds. If a server fails 3 checks in a row, it gets marked as down. It will only be brought back into service after it passes 2 consecutive checks.
This kind of proactive monitoring is fundamental to building a self-healing system. For an even deeper look into system health, advanced real-time traffic monitoring tools can give you a much more granular view of your application’s true performance.
Advanced Load Balancer Configurations
Once your basic load balancing is humming along, it’s time to layer in the configurations that take your setup from functional to truly robust. These are the techniques that separate a simple configuration from an enterprise-grade infrastructure built for serious traffic and easy management.
Two of the most impactful features you can enable are SSL termination and the Balancer Manager. These tools are game-changers, letting you offload intensive cryptographic work from your app servers and manage your server pool on the fly without the dreaded service restart.
Mastering SSL Termination for Better Performance
SSL termination is a classic, powerful strategy. The idea is simple: let the Apache load balancer handle all incoming HTTPS encryption and decryption. It “terminates” the secure connection from the user, then speaks to your backend servers over standard, unencrypted HTTP.
Why do this? Because SSL/TLS handshakes are CPU-intensive. By offloading this work, you free up your application servers to do what they do best: run your application logic. This one change can have a massive impact on your application’s responsiveness.
It also makes certificate management a breeze. Instead of juggling certificates on every single backend server, you manage just one on the load balancer. As your server farm grows, this becomes a huge operational win.
Apache is a workhorse for this kind of setup, often sitting in front of application servers like Tomcat or PHP. It’s a common pattern in hosting environments for content management systems and legacy web apps, where Apache handles the TLS termination and traffic distribution. For a deeper dive, you can explore more about Apache’s role in modern architecture.
Dynamic Management with the Balancer Manager
One of Apache’s best-kept secrets is the Balancer Manager, a built-in web interface that gives you real-time visibility and control over your load balancer pool. Forget editing config files and reloading the service every time you need to make a change.
Enabling it is straightforward. Just add a Location block to your Apache configuration:
<Location “/balancer-manager”> SetHandler balancer-manager Require host your-internal-domain.com
Once you have it running, the Balancer Manager lets you:
- See the live status of every backend server (
BalancerMember). - Tweak load balancing factors and routes on the fly.
- Gracefully pull a server out of rotation for maintenance without dropping a single active connection.
This dynamic control is invaluable during deployments or troubleshooting. You can take a server out of rotation, push new code, and bring it back online with zero downtime for your users. It shifts your management from a static, file-based process to an interactive, real-time operation.
Fine-Tuning Performance Parameters
Beyond the big features, you can squeeze even more performance out of your setup by fine-tuning specific timeout and connection pool settings. Directives like ProxyTimeout and ProxyBadServerRetry give you precise control over how the load balancer behaves when backend servers get slow or flaky.
For example, a sensible ProxyTimeout prevents a single sluggish backend from hogging resources and tanking the user experience for everyone else. Likewise, ProxyBadServerRetry tells Apache how long it should wait before sending traffic back to a server it previously marked as down.
Dialing in these values based on your application’s real-world performance profile is what makes your apache load balancing setup not just functional, but genuinely resilient and optimized for your specific workload.
Common Questions About Apache Load Balancing
Even with a solid configuration in place, you’re bound to run into a few head-scratchers when managing an Apache load balancer. Let’s tackle some of the most common questions that pop up, clearing the air so you can fine-tune your setup for rock-solid performance.
Can Apache Load Balance Non-HTTP Traffic?
It’s a great question. While Apache is the undisputed king of web traffic, its skills don’t end there. By using mod_proxy_tcp, you can actually get it to load balance generic TCP connections. This can be handy for things like database connections or other custom TCP-based services you might have running.
That said, for its bread and butter—HTTP and HTTPS—mod_proxy_http is always the right tool for the job. It’s built to understand the application layer, which opens the door for intelligent routing, tweaking headers on the fly, and a whole host of web-specific tasks that a basic TCP proxy just can’t touch.
The bottom line? While it’s possible to balance non-HTTP traffic, Apache truly shines as a Layer 7 load balancer for web applications. For anything else, you might be better off reaching for a dedicated TCP load balancer.
What Is the Difference Between ProxyPass and ProxyPassReverse?
This one trips people up all the time, but getting it right is absolutely critical for your setup to work correctly.
-
ProxyPassis the forward-moving rule. It’s what tells Apache, “Hey, when a request for this URL comes in, I want you to send it over to that backend server or balancer group.” It’s the directive that kicks off the whole proxying process. -
ProxyPassReversehandles the return trip. Picture this: your backend application sends back a response with a redirect header (like aLocationheader). This directive cleverly rewrites that header so it points back to your public-facing proxy server, not the internal backend server the user can’t see.
Without ProxyPassReverse, if your app at http://appserver1.local/login tries to redirect to /dashboard, the user’s browser gets sent to the wrong place: http://appserver1.local/dashboard. That address is useless to them. ProxyPassReverse fixes this mess, making sure the redirect points to your public URL and everything just works.
How Does Apache Handle a Failing Backend Server?
Out of the box, not very well. If a server in your balancer pool goes down for the count, Apache will just keep blindly sending it requests. Those requests will eventually time out, and your users will see nothing but errors.
This is precisely why health checks are not optional in any serious production setup. By configuring health checks, you give Apache the ability to proactively keep an eye on each backend server. As soon as a server stops responding properly, Apache will automatically flag it as “down” and pull it out of the rotation.
This self-healing trick is the secret to high availability. Traffic is instantly redirected to the healthy servers, and the failing one only gets brought back into the fold once it starts passing its health checks again. Best of all, it happens automatically, with no late-night calls or manual fiddling required.
Ready to see how your load balancing configuration holds up under real-world pressure? GoReplay lets you capture and replay live production traffic in a safe test environment, ensuring your setup is truly battle-tested. Find out how to safely stress-test your infrastructure at https://goreplay.org.