Mastering Apache Load Balancer Configuration

At its heart, an Apache load balancer is a clever setup that uses the trusty Apache HTTP Server to spread incoming traffic across several backend servers. Using powerful modules like mod_proxy_balancer, Apache stops being just a web server and becomes a smart traffic cop. This keeps any single server from getting swamped and seriously boosts your application’s uptime.
Why Choose Apache for Load Balancing

Before we jump into the configuration details, let’s talk about why Apache is still a solid choice for load balancing. Sure, newer and more specialized tools are out there, but Apache’s real strength is its incredible flexibility and the fact that millions of devs and admins already know it inside and out. It’s not just a web server; it’s a mature, battle-tested platform.
Apache has been a web infrastructure heavyweight for decades. In fact, as of 2025, it still powers around 25.3% of all websites where the server is known, making it the second most popular choice on the planet. This huge install base means its load balancing features are built on a rock-solid and well-understood foundation. You can explore the latest web server market share stats to see how it stacks up.
The Power of Modularity
The secret sauce to Apache’s flexibility is its module system. For load balancing, the star of the show is mod_proxy_balancer. It works hand-in-hand with other proxy modules (mod_proxy, mod_proxy_http, and so on) to build a really robust traffic distribution setup. This modular design lets you customize everything, tailoring the configuration to your exact needs instead of being stuck with a one-size-fits-all solution.
This is a huge win in a few common situations:
- Existing Apache Environments: If your team is already managing a bunch of Apache servers, using one for load balancing is a no-brainer. You’re leveraging skills and tools you already have, so there’s no steep learning curve for a new technology stack.
- Complex Routing Rules: Apache’s configuration files, like
.htaccessandhttpd.conf, give you surgical control over request handling. You can set up complex URL-based routing, tweak headers, and apply rewrite rules right at the load balancer level. - Hybrid Infrastructure: Got a mix of on-premise servers and cloud instances? An Apache load balancer can serve as a single, consistent entry point, making it much easier to manage traffic across these different systems.
Key Takeaway: Choosing Apache for load balancing often comes down to ecosystem familiarity and the need for deep, flexible configuration. It really shines in environments where you can put its powerful module system to work solving specific and complex routing puzzles.
Before you even think about touching those configuration files, let’s talk prep work. Jumping straight in is a classic rookie mistake that leads to a world of frustration later. A truly solid Apache load balancer is built on a well-prepared foundation, which means getting the right modules in place and having a clear picture of your server architecture.
First things first, Apache needs the right tools for the job. You can think of its modules as plugins that unlock specific capabilities. Without the core proxying and balancing modules, any fancy configuration you write is just going to get ignored.
Activating Core Apache Modules
Your first move is to make sure the essential proxy modules are fired up and ready to go. On Debian-based systems like Ubuntu, you’ll typically use the a2enmod command. For Red Hat folks, this usually involves a quick edit to the main configuration file.
Here are the non-negotiables:
mod_proxy: This is the big one, the foundational module that all other proxy modules depend on. It provides the core proxying engine.mod_proxy_http: As the name suggests, this is what lets Apache handle HTTP and HTTPS requests, which is pretty essential for web traffic.mod_proxy_balancer: This is the star of the show. It adds the load balancing logic and gives you access to the handy Balancer Manager interface for monitoring.
Seriously, you need all three. Forgetting even one is probably the most common reason I see for setups that mysteriously “just don’t work.”
Pro Tip: Don’t forget to restart or gracefully reload Apache after you enable new modules. A quick
sudo systemctl restart apache2makes sure your changes actually stick before you dive into the balancer config.
Architecting Your Server Layout
With the modules online, it’s time to think about the physical (or virtual) layout of your servers. A standard, battle-tested setup involves one server acting as the dedicated Apache load balancer and at least two identical backend servers ready to handle the actual application requests.
This separation is the key to high availability. The load balancer becomes the single gateway for all incoming traffic, while the backend servers—often called “workers” or “members”—do all the heavy lifting in the background.
For this to work, your networking has to be perfect. The load balancer absolutely must be able to reach each backend server over the network. Double-check that no firewalls are getting in the way and blocking necessary ports (like 80 or 8080). A single connectivity hiccup between the balancer and a worker will cause requests to fail, completely defeating the purpose of your resilient setup. A little planning here goes a long way.
Alright, let’s get our hands dirty and build a functional Apache load balancer configuration from scratch. We’ll be using mod_proxy_balancer for this, and I’ll break down each directive so you understand not just what to do, but why you’re doing it.
First, take a look at the general process flow. This gives you a high-level map of where we’re headed.
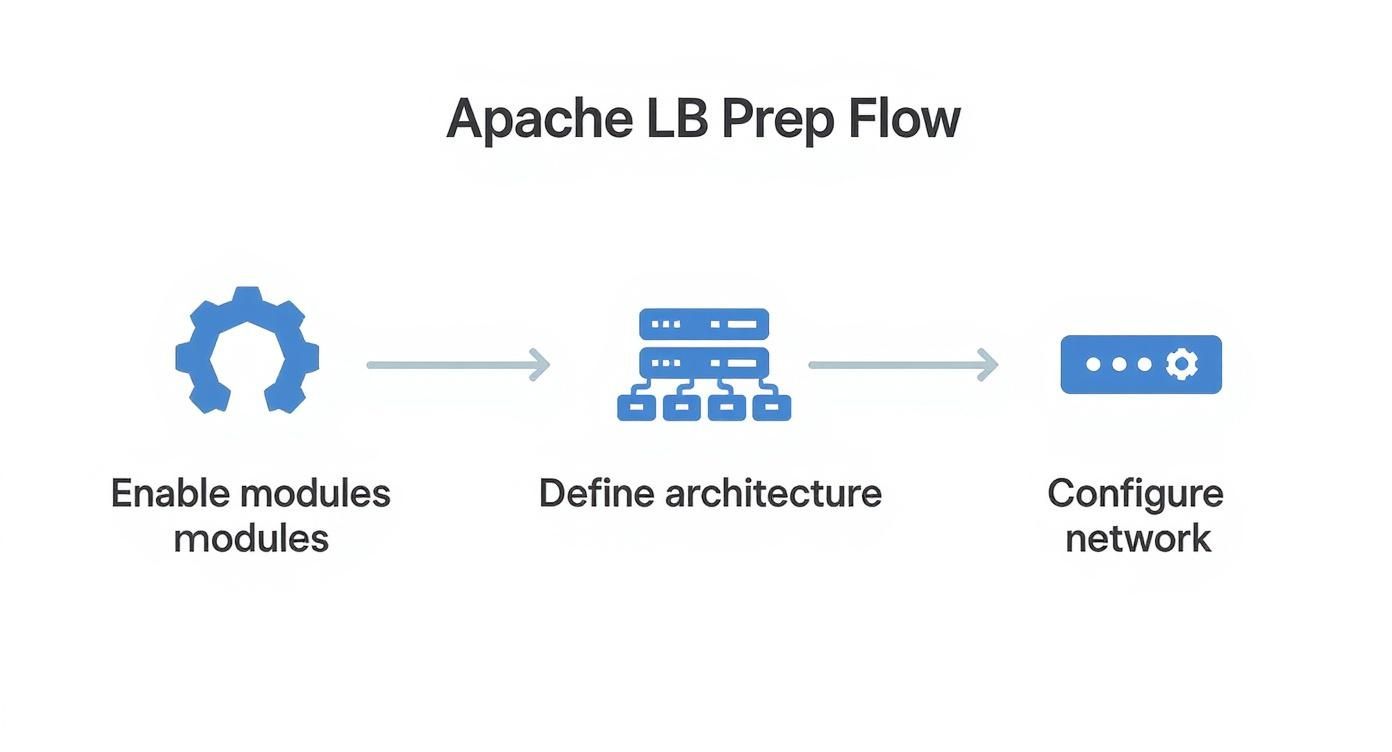
This just reinforces the basic steps: enable the modules, define the server architecture, and make sure everything can talk to each other. Simple enough.
Defining the Balancer Cluster
Everything kicks off inside your Apache configuration file, usually within a <VirtualHost> block. This is where you’ll tell Apache about the group of backend servers it’s going to manage, which it calls a balancer cluster.
You create this cluster using a <Proxy> block with a special balancer:// URL. Think of this URL as an internal nickname for your server pool—it’s not a real address, just an identifier Apache uses.
Here’s what a basic setup looks like:
<Proxy balancer://mycluster> # Backend servers go here BalancerMember http://appserver1.local:8080 BalancerMember http://appserver2.local:8080
In this snippet, mycluster is just the name I’ve given our balancer group. Inside, we have two BalancerMember directives, each pointing to a backend application server that will do the actual work. This is the heart of the whole setup.
Important Takeaway: The
balancer://protocol is the magic ingredient here. It’s how Apache knows you’re setting up a load-balanced group and not just a standard reverse proxy. Getting this right is fundamental.
Routing Traffic to the Cluster
Defining the cluster is step one. Now, you need to tell Apache which incoming requests should be sent to it. This is where the ProxyPass directive comes in. It’s the bridge connecting a public-facing URL to your internal balancer cluster.
Let’s add it to our configuration:
<VirtualHost *:80> ServerName yourdomain.com
<Proxy balancer://mycluster>
    BalancerMember http://appserver1.local:8080
    BalancerMember http://appserver2.local:8080
</Proxy>

# Send all traffic to the balancer
ProxyPass / balancer://mycluster/
ProxyPassReverse / balancer://mycluster/
The ProxyPass line maps every request coming to your domain (represented by /) over to the mycluster group we defined. ProxyPassReverse is just as critical; it rewrites the HTTP headers in the responses from the backend servers. This prevents weird redirection issues by making sure they point back to the load balancer’s address, not the internal app server’s.
Apache’s load balancing has come a long way, especially with modules like mod_proxy_balancer that added features like session persistence and health checks. That said, it can still be outrun by more specialized tools in really high-traffic situations. If you’re curious, you can dig into a detailed comparison of server performance to see where the differences lie.
Adding Basic Load Balancing Logic
With the routing in place, it’s time to decide how Apache distributes the traffic. The lbmethod parameter is your main control for this. You set it inside the <Proxy> block to tell Apache which algorithm to use.
Let’s update our cluster to use the most common method, byrequests, which just sends requests to each server in a round-robin fashion.
<Proxy balancer://mycluster> BalancerMember http://appserver1.local:8080 BalancerMember http://appserver2.local:8080 # Add the load balancing method ProxySet lbmethod=byrequests
This one line ensures the first request goes to appserver1, the second to appserver2, the third back to appserver1, and so on. It’s a simple and effective way to balance the load, especially for stateless applications.
And that’s it. You now have a working, basic Apache load balancer ready to go.
Tuning Your Load Balancer for Peak Performance
Getting a basic Apache load balancer online is a great first step, but a real-world production environment demands so much more than simple round-robin traffic distribution. To build a system that’s genuinely resilient and high-performing, you need to get your hands dirty and fine-tune its behavior.
The best place to start is with the load balancing method itself.
https://www.youtube.com/embed/gQuCBLxwNVQ
The lbmethod you choose fundamentally changes how Apache divvies up incoming requests. While the default byrequests is a solid, simple starting point, it operates on the flawed assumption that all requests are created equal. In the real world, that’s almost never true.
This growing need for high availability and performance is why the global load balancer market is exploding. Projections showed it growing from USD 2.6 billion in 2018 to USD 5.0 billion by 2023—a clear sign of just how critical this piece of infrastructure has become. You can read more about these market trends to get the bigger picture.
Choosing the Right Load Balancing Method
Picking the right lbmethod is all about matching the algorithm to your application’s unique traffic patterns and workload. Let’s break down the three main options you have.
Load Balancing Method Selection Guide
Choosing the right load balancing method is crucial for optimizing performance and ensuring reliability. This guide breaks down the three primary methods available in mod_proxy_balancer to help you select the one that best fits your application’s needs.
| Load Balancing Method | Best For | Common Use Case |
|---|---|---|
byrequests | Applications with uniform, stateless requests. | Simple API endpoints or static content servers where each request has a similar processing cost. |
bytraffic | Servers handling requests of varying sizes. | A file-serving application where users might download a 1 KB icon or a 100 MB video file. |
bybusyness | Environments with long-running or CPU-intensive tasks. | Applications that process complex reports or handle persistent connections where server load fluctuates. |
Each method serves a distinct purpose, so understanding your traffic is key to making the right choice. For many modern applications, bybusyness is often the smartest choice.
The bybusyness method is particularly powerful. It intelligently avoids sending new work to servers already bogged down with existing tasks. This makes it one of the most effective ways to maintain quick response times, even when your traffic load is completely unpredictable.
Implementing Sticky Sessions for Consistency
But what happens when a user needs to maintain a consistent session, like with an e-commerce shopping cart? If their requests bounce between different servers, they’ll lose their cart data with every click. That’s a terrible user experience.
The solution is a sticky session.
You can enable this with the stickysession directive, which essentially tells Apache to “stick” a user’s session to a specific backend server for its entire duration.
<Proxy balancer://mycluster> BalancerMember http://appserver1.local:8080 BalancerMember http://appserver2.local:8080 ProxySet lbmethod=byrequests # Add sticky session configuration Header add Set-Cookie “BALANCEID=.%{BALANCER_WORKER_ROUTE}e; path=/;” env=BALANCER_ROUTE_CHANGED ProxySet stickysession=BALANCEID
This setup uses a cookie named BALANCEID to track which worker is handling the user’s session. It’s a simple but effective way to ensure all subsequent requests from that user land on the exact same server.
Configuring Health Checks and Timeouts
A load balancer is only as reliable as its ability to spot and react to failures. This is where health checks come in—they are absolutely crucial. They give the Apache load balancer the power to automatically and temporarily pull a failing server out of the pool, protecting your users from errors.
Pro Tip: Always configure a
timeoutparameter on yourBalancerMemberdirectives. This stops the load balancer from waiting around forever for a non-responsive backend, which can easily trigger a cascade of failures and bring your whole application crashing down. A short timeout of 5-10 seconds is usually a good place to start.
Finally, once you’ve tuned your configuration, you have to validate it. The only way to know for sure if your settings can handle a real traffic spike is to throw one at it. Using tools for realistic load testing based on production traffic is the best way to find bottlenecks before your users do.
Monitoring Health and Diagnosing Issues

A “set it and forget it” mindset is a recipe for disaster with critical infrastructure like an Apache load balancer. Once you’ve got the system tuned and humming along with live traffic, the job isn’t over. It just shifts to active observation. You absolutely need a way to keep a close eye on its health so you can spot small problems before they cascade into major outages.
Luckily, Apache comes with a fantastic built-in tool for exactly this purpose.
Activating the Balancer Manager
The Balancer Manager is a simple web interface that acts as a real-time dashboard for your entire balancer cluster. Getting it enabled is surprisingly easy, and it instantly gives you a visual on the status of each backend server, or BalancerMember. From one screen, you can see which servers are active, which are disabled, and—most importantly—which are in an error state.
To get it running, you just need to add a new Location block to your virtual host configuration. This block defines the URL for the manager and, crucially, who can access it.
<Location “/balancer-manager”> SetHandler balancer-manager Require host localhost
This snippet makes the manager available at /balancer-manager but locks it down so only requests from the server itself can get in. The real power here is the ability to make on-the-fly adjustments. You can manually disable a server for maintenance, tweak its routing parameters, or gracefully drain connections without ever touching your core config files and restarting Apache.
Key Insight: The Balancer Manager isn’t just for looking; it’s an active control panel. Being able to drain connections from a server before taking it offline for an update is a massive win for maintaining zero-downtime deployments.
Diagnosing Issues with Apache Logs
When things inevitably go sideways, your first stop should always be the logs. For a load-balanced setup, this means checking logs on both the balancer and the backend servers. The load balancer’s error log will tell you if it’s having trouble reaching a backend, usually with clear messages about a worker being in an error state.
The access logs on your backend servers, however, can be a bit misleading. By default, they’ll only show the load balancer’s IP as the client for every single request. To get the real user’s IP, you have to configure Apache to look for the X-Forwarded-For header. It’s a small change, but it makes debugging specific user sessions infinitely easier.
Stress Testing Your Configuration
Ultimately, the best way to diagnose issues is to find them before your users do. Proactive stress testing isn’t just a good idea; it’s non-negotiable. Throwing a controlled but heavy load at your Apache setup helps you unearth hidden bottlenecks, misconfigured timeouts, or performance ceilings in your backend application code that you’d never find otherwise.
A far more powerful technique involves using real production data for these tests. For a truly authentic simulation, you can explore comprehensive monitoring based on replaying user sessions. This approach provides priceless insights into how your setup handles real-world traffic patterns and strange edge cases. You move beyond simple, predictable tests and prepare your infrastructure for the chaos of actual user behavior, ensuring your system is genuinely resilient.
Got Questions? We’ve Got Answers
Even with a rock-solid configuration, a few questions always seem to pop up when you’re in the trenches with an Apache load balancer. Let’s run through some of the most common ones I hear to clear things up.
Can Apache Load Balance More Than Just HTTP Traffic?
You bet. While mod_proxy_http is the workhorse for standard web traffic, Apache is far from a one-trick pony. Its modular design is one of its greatest strengths.
For example, if you’re running backend Tomcat servers, you can use mod_proxy_ajp to balance traffic using the AJP protocol. Working with real-time communication? mod_proxy_wstunnel is built specifically for load balancing WebSocket traffic. This means you can often use a single, well-configured Apache instance to direct all sorts of different application traffic, keeping your stack a little simpler.
How Does Apache Handle SSL in a Load Balancing Scenario?
You’ve got two main ways to tackle SSL/TLS encryption, and the right choice really boils down to your security posture and performance goals.
The most common strategy by far is SSL Termination. In this setup, the Apache load balancer handles all the heavy lifting of decrypting incoming HTTPS traffic. It then forwards the requests to your backend servers over plain, unencrypted HTTP. This is a huge win for efficiency, as it offloads the CPU-intensive SSL processing from your application servers, letting them focus purely on their job.
The other option is SSL Passthrough. Here, the encrypted traffic zips right through the load balancer untouched, and the backend servers themselves are responsible for decryption. It’s less common, but you’ll see it in high-security environments where strict end-to-end encryption is non-negotiable.
Key Takeaway: For most use cases, SSL Termination is the way to go. It simplifies your certificate management (only the balancer needs one) and frees up your backend fleet, which almost always leads to better overall application performance.
What Are the Main Performance Limitations of Using Apache?
If there’s one area where Apache can hit a ceiling, it’s rooted in its core architecture. Apache relies on a process-based or a hybrid process-and-thread model, which you’ll know as its Multi-Processing Module, or MPM.
This model is incredibly stable and powerful, but under extremely high concurrency—we’re talking thousands upon thousands of simultaneous connections—it can start to eat up more memory and CPU than event-driven architectures like Nginx. This makes Apache a fantastic and reliable choice for a huge number of enterprise applications. But for scenarios where raw connection efficiency at a massive scale is the only thing that matters, you might feel the strain. Getting your chosen MPM tuned just right is absolutely critical to squeezing every last drop of performance out of your setup.
Updates can be scary, but they don’t have to be. With GoReplay, you can capture and replay real production traffic in a test environment, ensuring your changes are rock-solid before they go live. Find and fix issues with total confidence. Learn more about GoReplay and deploy with peace of mind.