A Practical Guide to Apache HTTP Server Reverse Proxy

Let’s get straight to the point. An Apache HTTP Server reverse proxy is essentially a traffic manager for your web applications. It sits between the internet and your backend servers, directing all incoming user requests to the right place while keeping your internal setup completely hidden. Think of it as a bouncer at a club—it controls who gets in and where they go, ensuring everything runs smoothly and securely.
The Strategic Role of an Apache Reverse Proxy

Putting an Apache reverse proxy in place is more than just a neat technical trick; it’s a cornerstone of solid web architecture. By funneling everything through Apache, you create a centralized control point for all your traffic. This single entry point is incredibly powerful for managing and securing your entire infrastructure.
For DevOps and QA teams, this is a game-changer. It gives you a crucial vantage point to inspect and manage traffic before it ever reaches your core services. This visibility is exactly what you need to build a more resilient and scalable system. It’s no surprise that Apache remains a dominant force, holding a 36% market share among top web servers in 2025 and powering over 4.6 million websites. If you’re curious, you can find more web server market share data on Monitor.us.
Why Apache Is Still a Go-To For This
With plenty of other options out there, you might be asking, “Why stick with Apache?” The answer is simple: flexibility and a massive ecosystem of modules. A well-configured Apache reverse proxy delivers immediate, tangible benefits that solve real-world operational headaches.
Deploying a reverse proxy is a smart move for any serious web architecture. The table below breaks down the core benefits you get by putting Apache in front of your backend servers.
Key Benefits of Using an Apache Reverse Proxy
| Benefit Category | Description | Primary Apache Module(s) |
|---|---|---|
| Security | Hides the identity and architecture of your backend servers. Only the proxy’s IP address is public, shrinking your attack surface. | mod_proxy, mod_ssl, mod_security2 |
| Load Balancing | Distributes incoming traffic across multiple backend servers to prevent bottlenecks and ensure high availability. | mod_proxy_balancer, mod_lbmethod_byrequests |
| Performance | Offloads tasks like SSL/TLS termination and caches static content (images, CSS) to speed up response times and reduce backend load. | mod_ssl, mod_cache, mod_expires |
| Flexibility | Integrates disparate applications running on different ports or servers into a single, cohesive domain. | mod_proxy_http, mod_proxy_wstunnel, mod_rewrite |
This setup simplifies things immensely, especially when you have multiple services that need to talk to the outside world.
A reverse proxy turns a complex backend infrastructure into a simple, single, and secure entry point. It’s the difference between managing a dozen open doors and a single, well-guarded gate.
This is especially true when you’re running multiple services on the same machine. Instead of exposing a bunch of different ports—which is a nightmare for firewall rules—the reverse proxy lets all your services communicate through the standard HTTPS port 443. It’s a cleaner, more secure way to manage your network.
Alright, let’s get our hands dirty and build your first Apache reverse proxy. We’re going to skip the dry theory and jump right into a practical setup that you can get running in minutes.
This is a bread-and-butter configuration you’ll use all the time: forwarding traffic from your public domain to a backend app running on a local port. Think Node.js, Python, or Java apps that shouldn’t be exposed directly to the internet.
Getting the Modules Ready
Before you can write a single line of config, you need to make sure Apache has the right tools for the job. The whole proxying engine is built on modules. For this basic setup, you just need two: mod_proxy and mod_proxy_http.
mod_proxy: This is the core proxying module. It does all the heavy lifting.mod_proxy_http: This is the add-on that specifically handles, you guessed it, HTTP traffic.
On Debian or Ubuntu, enabling them is a one-liner. Fire up your terminal and run this:
sudo a2enmod proxy proxy_http sudo systemctl restart apache2
That’s it. The first command flips the switch on the modules, and the restart makes Apache load them. Now, your server officially knows how to be a reverse proxy.
Crafting the Virtual Host
Now for the fun part—the configuration itself. On most Linux systems, you’ll find Apache’s site configurations tucked away in /etc/apache2/sites-available/. We’re going to create a new file in there (or edit an existing one) to tell Apache what to do.
Let’s say you have a backend application running on http://localhost:8080. You want anyone visiting yourdomain.com to see that application.
Here’s the VirtualHost block that makes it happen:
<VirtualHost *:80> ServerName yourdomain.com
ProxyRequests Off
ProxyPreserveHost On

ProxyPass / http://localhost:8080/
ProxyPassReverse / http://localhost:8080/

ErrorLog ${APACHE_LOG_DIR}/error.log
CustomLog ${APACHE_LOG_DIR}/access.log combined
Let’s break down what these lines actually do. Understanding this now will save you a ton of headaches later when you build more complex setups.
ProxyRequests Off: This is a non-negotiable security setting. It kills Apache’s forward proxy capabilities, which prevents bad actors from using your server to hide their own traffic. Always set this toOff.ProxyPreserveHost On: This one is subtle but critical. It passes the originalHostheader from the client’s request straight to your backend app. Many modern applications rely on this header to know which domain they’re serving, so you almost always want thisOn.ProxyPass / http://localhost:8080/: This is the star of the show. It tells Apache: “Hey, any request that comes in for/(which means everything) should be forwarded to the app athttp://localhost:8080/.”ProxyPassReverse / http://localhost:8080/: This is the wingman toProxyPass. It rewrites response headers from the backend. If your app sends a redirect (like from a login page), this directive makes sure the client is sent toyourdomain.com/login, notlocalhost:8080/login.
The combination of
ProxyPassandProxyPassReversecreates a completely transparent bridge. Your users have no idea their requests are being handled by a separate app on a different port. To them, it’s all one seamless experience.
Firing It Up and Testing
Once you’ve saved that configuration (let’s say you named it myapp.conf), you just need to tell Apache to use it.
sudo a2ensite myapp.conf sudo systemctl reload apache2
The a2ensite command creates a symlink from sites-available to sites-enabled, which is how you activate a site. A quick reload tells Apache to apply the new rules without dropping any active connections.
And just like that, your Apache HTTP Server reverse proxy is live. All traffic hitting your server on port 80 is now being neatly forwarded to your backend application. This simple, powerful config is the foundation for almost everything else you’ll do, from load balancing across multiple servers to mirroring traffic for testing.
Advanced Configurations for Real-World Scenarios
Once you’ve nailed the basics, it’s time to tackle the kind of setups you’ll actually find in production. A real-world Apache HTTP Server reverse proxy needs to be flexible, resilient, and ready to handle whatever your applications throw at it. This is where we get into the configurations that DevOps engineers use to build systems that can scale and recover gracefully.
Let’s walk through some practical, commented examples for the heavy hitters: load balancing, WebSocket proxying, and SSL termination. Each one is a common requirement for modern web infrastructure.
This flowchart gives you a quick visual of the standard workflow. You get the modules ready, write the rules, and then test—a simple process that keeps you from running into preventable errors.
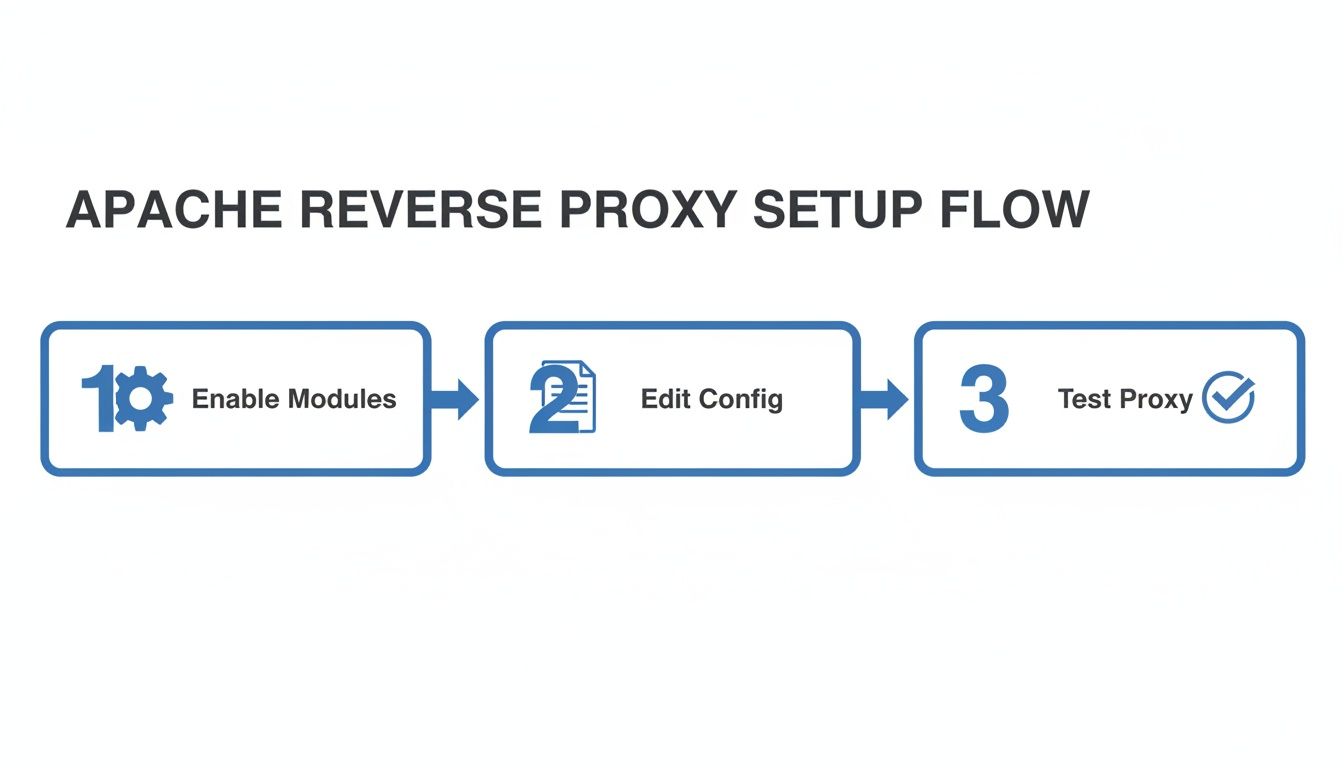
Following this progression ensures your server is equipped with the right tools before you start applying rules, which saves a lot of headaches down the line.
Balancing Traffic Across Multiple Servers
As your application grows, relying on a single backend server is just asking for trouble—it’s a massive single point of failure. The answer is load balancing, and Apache’s mod_proxy_balancer handles it like a champ. The module distributes incoming requests across a whole pool of backend servers, boosting both performance and reliability.
Let’s say you have two app servers, one at 10.0.0.1:8080 and another at 10.0.0.2:8080. Here’s how you’d set up Apache to share the load between them.
First, make sure the necessary modules are fired up:
sudo a2enmod proxy_balancer lbmethod_byrequests
Then, you’ll want to add a balancer configuration right inside your VirtualHost block.
<VirtualHost *:80> ServerName yourapp.com
<Proxy balancer://mycluster>
    BalancerMember http://10.0.0.1:8080
    BalancerMember http://10.0.0.2:8080
    ProxySet lbmethod=byrequests
</Proxy>

ProxyPass / balancer://mycluster/
ProxyPassReverse / balancer://mycluster/
Handling Stateful Applications with Sticky Sessions
But what if your application needs a user to stay connected to the same backend server for their whole visit? This is super common for e-commerce sites with shopping carts or any app that holds state. That’s where sticky sessions come in.
You can add this logic right on top of your existing load balancer config.
<VirtualHost *:80> ServerName yourapp.com
Header add Set-Cookie "ROUTEID=.%{BALANCER_WORKER_ROUTE}e; path=/" env=BALANCER_ROUTE_CHANGED

<Proxy balancer://mycluster>
    BalancerMember http://10.0.0.1:8080 route=node1
    BalancerMember http://10.0.0.2:8080 route=node2
    ProxySet stickysession=ROUTEID
</Proxy>

ProxyPass / balancer://mycluster/
ProxyPassReverse / balancer://mycluster/
Sticky sessions are a lifesaver for stateful applications that weren’t built for modern, stateless architectures. They act as a bridge, letting you load balance older systems without having to rewrite them from the ground up.
Proxying Modern WebSocket Connections
WebSockets are the backbone of any real-time application—think chat apps, live financial dashboards, or online games. They keep a persistent, two-way communication channel open. The problem? A standard HTTP reverse proxy will immediately break that connection.
To properly handle WebSocket traffic (ws:// or wss://), you’ll need mod_proxy_wstunnel.
This module really shows how adaptable Apache still is. While market share is a tight race, with Apache holding 44% against Nginx’s 56%, its power in complex, customized enterprise environments is undeniable. Apache’s core reverse proxy features, driven by directives like ProxyPass, have been a staple since version 2.2 dropped way back in 2005.
Here’s how you’d configure Apache to proxy a WebSocket endpoint located at /wsapp.
<VirtualHost *:80> ServerName yourchatapp.com
# Send WebSocket traffic to the dedicated WS server
ProxyPass /wsapp/ ws://localhost:6001/
ProxyPassReverse /wsapp/ ws://localhost:6001/

# Handle all other standard HTTP traffic
ProxyPass / http://localhost:8080/
ProxyPassReverse / http://localhost:8080/
Terminating SSL at the Edge
A non-negotiable security practice is SSL/TLS termination. In this model, your Apache reverse proxy does all the heavy lifting of encrypting and decrypting HTTPS traffic. The connection from the proxy to your backend servers can then be plain, unencrypted HTTP over your internal network.
This setup gives you a few major wins:
- Centralized Certificate Management: You only deal with SSL certificates on the proxy server, not on every single backend app.
- Reduced Backend Load: Your application servers are freed from the CPU-intensive work of handling SSL/TLS handshakes.
- Simplified Backend Configuration: Your backend apps don’t even need to know HTTPS exists, which can simplify their setup quite a bit.
Here’s a typical VirtualHost for port 443 that terminates SSL and passes traffic to an HTTP backend.
<VirtualHost *:443> ServerName yoursecureapp.com
SSLEngine on
SSLCertificateFile /path/to/your_domain.crt
SSLCertificateKeyFile /path/to/your_domain.key

# Other SSL settings can go here...

ProxyRequests Off
ProxyPreserveHost On

ProxyPass / http://localhost:8080/
ProxyPassReverse / http://localhost:8080/
This type of setup is also ideal for more advanced validation techniques. For instance, you can learn more about the concept of shadow testing to see how you can replay production traffic against a staging environment without any user impact.
Mirroring Live Traffic with GoReplay

Testing new features with real user traffic is the holy grail for QA, but running those tests on a live system is a high-stakes gamble. This is where traffic mirroring, sometimes called traffic shadowing, comes in. It’s a powerful technique that lets you safely test new code, performance tweaks, or infrastructure upgrades with a full, real-time copy of your production traffic—all without putting your users at risk.
Your Apache HTTP Server reverse proxy is the perfect place to set this up. With just a few smart directives, you can tell Apache to send every incoming request to two places at once: your stable production backend and a separate test environment where a tool like GoReplay is listening.
This happens completely in the background. The user’s original request is handled by your production app as always, while a duplicate is silently forked off for your testing. The user never knows the difference.
Why Bother with Traffic Mirroring?
The whole point is to get away from synthetic, scripted tests. While load testing tools have their place, they rarely capture the messy, unpredictable reality of how actual humans use your application. Mirroring injects that dose of reality directly into your QA process.
- Realistic Load Patterns: See exactly how your new build handles the real peaks and valleys of daily traffic, not just a simulated ramp-up.
- Discover Hidden Bugs: Uncover those tricky edge-case bugs that only pop up under specific, real-world request sequences.
- Validate Performance Changes: Confidently measure latency and resource usage with production-grade traffic before a single user is affected.
For DevOps teams, this approach means you can use Apache to front session-aware traffic—a perfect match for GoReplay’s replay engine. It can ingest captured proxy logs to simulate real-user patterns at scale, detecting issues with 95% more accuracy than scripted tests ever could.
Configuring Apache for Traffic Shadowing
Setting up mirroring in Apache is surprisingly straightforward. The trick is to use mod_proxy in a way that duplicates the request stream without interfering with the primary response.
Let’s say your production app is running at http://localhost:8080, and you have a GoReplay listener ready to catch mirrored traffic at http://localhost:8081.
You can’t just stack two ProxyPass directives for the same path, because Apache will only use the first one it finds. The real solution is to combine mod_rewrite with the [P] (proxy) and [L] (last rule) flags.
Here’s the configuration that makes the magic happen:
<VirtualHost *:80> ServerName your-app.com
# This is the standard proxy to your production application
ProxyPass / http://localhost:8080/
ProxyPassReverse / http://localhost:8080/

# Now, mirror the traffic to your GoReplay listener
RewriteEngine On
RewriteRule ^(.*)$ http://localhost:8081$1 [P,L]
In this setup, the RewriteRule matches every incoming request first. The [P,L] flags tell Apache to proxy a copy of that request to your GoReplay listener and then stop processing any more rewrite rules.
But here’s the key: ProxyPass operates at a different stage in Apache’s request-handling process. So, it still forwards the original request to your production backend. You get two identical requests sent to two different places. For a deeper dive into the mechanics, our guide on how to effectively replay HTTP traffic is a great resource.
Crucial Insight: Apache completely discards the response from the mirrored request. The end-user only ever sees the response from the primary
ProxyPassdestination. This is what makes the entire process completely safe for live production environments.
This simple configuration turns your Apache reverse proxy from a basic traffic router into a powerful, non-invasive testing tool, letting you deploy with a whole lot more confidence.
Hardening and Tuning Your Reverse Proxy
Getting a reverse proxy up and running is just the beginning. A real production environment needs more than a basic config—it needs to be hardened against threats and tuned for speed. Let’s move past the initial setup and focus on the best practices that turn a simple proxy into a resilient, high-performance gateway.
Think of these adjustments as non-negotiable. They’re fundamental to building a secure, efficient architecture that can handle real-world traffic without breaking a sweat. We’ll cover both sides of the coin: locking down your server and then making it fly.
Hardening Your Apache Reverse Proxy
Security always comes first. A poorly configured proxy can quickly become your biggest vulnerability. The absolute first thing you must do is shut down forward proxying.
ProxyRequests Off
This directive is critical. Leaving ProxyRequests On turns your server into an open forward proxy, which is a massive security hole. It lets anyone on the internet use your server to hide their traffic, which is a surefire way to get your server abused and blacklisted.
Next, look at the connection between your proxy and your backend servers. If they’re all on the same private, secure network, an unencrypted HTTP connection is usually fine. But if that traffic has to cross any network boundaries, you should always secure the link with SSL/TLS by proxying to an HTTPS backend.
For a serious layer of defense, you’ll want to integrate a Web Application Firewall (WAF) like ModSecurity. This module acts as a gatekeeper, inspecting all incoming traffic for common attack patterns like SQL injection and cross-site scripting (XSS). It blocks malicious requests before they even get a chance to hit your application.
Integrating
mod_securityturns your reverse proxy from a simple traffic director into an active security guard. It’s one of the most effective steps you can take to protect your entire application stack from a single, centralized point.
Fine-Tuning for Maximum Performance
Once you’ve secured your proxy, it’s time to make it fast. Performance tuning is all about cutting down latency and reducing the load on your backend applications. One of the most powerful strategies here is caching.
With mod_cache, you can store copies of frequently requested static files—like images, CSS, and JavaScript—right on the proxy. When a user asks for one of these files, Apache serves it directly from its cache instead of bothering the backend. This means a much faster response for the user and less work for your application servers.
Another huge win comes from enabling HTTP/2. This modern protocol introduces features like multiplexing, allowing multiple requests over a single connection. The result is a dramatic drop in page load times, especially for pages with lots of small assets.
Enabling it is often as simple as adding one line to your configuration:
Protocols h2 http/1.1
This tells Apache to prefer HTTP/2 (h2) whenever the browser supports it and to fall back gracefully to HTTP/1.1 if not. It’s a quick fix that delivers a much better user experience.
Optimizing Connection Handling with MPMs
Finally, don’t forget to look at your Multi-Processing Module (MPM) settings. The MPM controls how Apache handles simultaneous connections, and the default configuration is almost never right for a busy reverse proxy.
Apache offers a few MPMs, but the main ones you’ll see are:
prefork: The old-school, process-based model. It’s incredibly stable but a bit of a memory hog.worker: A hybrid model using both processes and threads, which scales much better thanprefork.event: The modern default for good reason. It’s an evolution of theworkerMPM, specifically optimized to handle keep-alive connections with amazing efficiency.
For almost any reverse proxy setup, the event MPM is the way to go. It’s designed to manage a ton of concurrent connections with low memory overhead. By carefully tuning its parameters, like ThreadsPerChild and MaxRequestWorkers, you can configure your proxy to handle huge traffic spikes smoothly, keeping your services responsive no matter the load.
Troubleshooting Common Apache Proxy Errors
When your Apache reverse proxy goes down, it can feel like you’re flying blind. But don’t worry—most problems leave a trail of breadcrumbs in the server logs. The trick is knowing where to look and how to interpret what you find.
Most of the time, the culprits are those dreaded 5xx status codes. These server-side errors almost always mean the problem isn’t with Apache itself, but with the connection between Apache and your backend application.
Decoding 502 and 503 Errors
A 502 Bad Gateway error is a classic. This tells you that Apache successfully connected to your backend, but the application sent back a garbled or invalid response. I’ve seen this happen countless times when a backend app crashes mid-request or hits a critical bug.
A 503 Service Unavailable error, on the other hand, points to a different issue. Apache tried to forward the request but couldn’t even connect to the backend server. The cause is usually simple: your application isn’t running, it crashed, or a network issue is blocking the connection.
Before you dive into complex configurations, always check the basics. Is your backend application actually running? Can you reach it directly from the proxy server with a tool like
curl? A surprising number of proxy headaches disappear after answering these two simple questions.
Digging Into Common Configuration Problems
Once you’ve ruled out basic connectivity, it’s time to look at your configuration file for more subtle problems. A forgotten directive can cause all sorts of strange behavior.
-
Lost Host Headers: Is your application seeing requests for
localhostinstead of the original domain? You probably forgot to setProxyPreserveHost On. This directive is crucial for most modern web apps, as it passes the originalHostheader from the client straight through to the backend. -
SSL Handshake Failures: If you’re proxying to an HTTPS backend, log errors about SSL handshakes usually point to a certificate mismatch or an unsupported protocol. Make sure your proxy server trusts the backend’s SSL certificate.
-
Dropped WebSocket Connections: WebSockets will absolutely break with a standard HTTP proxy setup. If your app’s real-time features are failing, you need to enable
mod_proxy_wstunneland use thews://orwss://protocols in yourProxyPassdirective for those specific endpoints.
Frequently Asked Questions
When you start digging into Apache as a reverse proxy, a few common questions always pop up. It’s one thing to get a basic setup running, but a production-ready environment introduces a whole new set of challenges. Let’s tackle a couple of the most frequent ones.
Can Apache Proxy to an HTTPS Backend?
Yes, absolutely. A lot of people terminate SSL at the proxy, but proxying traffic to a secure backend using HTTPS is a common requirement for end-to-end encryption. It’s a must-have in high-security environments.
To get this working, you’ll need the mod_ssl module enabled along with your other proxy modules. The setup looks a lot like a standard proxy configuration, but the key is telling Apache to speak SSL to the backend. You do this by using https in your ProxyPass directive.
The most common mistake I see here is forgetting to add
SSLProxyEngine Oninside the VirtualHost. Without this directive, Apache won’t even try to initiate an SSL/TLS connection to your backend, and you’ll be left scratching your head wondering why it’s failing.
Apache vs. Nginx For a Reverse Proxy
Ah, the classic debate. Honestly, there’s no single right answer—both are phenomenal tools, but they have different strengths.
Nginx gets a ton of love for its raw performance and incredibly low memory usage. If your main goal is to handle massive amounts of traffic with simple proxying rules, it’s tough to beat.
On the other hand, Apache’s true power lies in its flexibility and massive ecosystem of modules. If you need to build out complex routing logic, integrate tightly with something like mod_security, or if you’re already living in an Apache-centric world, it’s still an incredibly robust and powerful choice. The best tool for the job really comes down to what you need to accomplish and the infrastructure you already have.